
This article describes the steps that I went thru to install a replacement hard drive in a failing or failed Maxtor (Seagate) Central Axis 1 Tbyte NAS drive. Note that these drive units were recognized as to “run hot” and were designated by the manufacturer as not able to have the drives repaired or replaced by users and instead that the users were required to return the devices to the manufacturer to be repaired if they failed. Also they are no longer deemed to be secure devices (utilizing SMB v1) but I plan to leverage them as DMZ drives that will only contain mirrored data that can be lost and rebuilt.
Overview
- 1TB SATA II
- 7200 RPM drive and connectivity speeds of up to 1000Mbps
- Legacy Linux operating system

Background Information
The following is information available on how to replace the drives in the Maxtor Central Axis that was publicly available. Unfortunately, it does not warn you that the design was changed in these units to add heat sinks that prohibit users from being able to easily disassemble these drives units - refer to my “root cause” findings in the Detailed Disassembly instructions below on why the units can no longer be easily disassembled, These details were only discovered when attempting to remove the internal components for the drive unit.
Here is a copy of the User guide
Here is copy of the Admin guide (for similar drive)
Here is a where to download the v3.5.74 firmware:
Disassembling the Enclosure (publicly available info and not actually accurate)
- Power down: Turn off the Maxtor Central Axis and unplug the power and Ethernet cables.
- Open the case: Carefully pry apart the plastic outer housing using a plastic spudger or flathead screwdriver along the seam clips.
- Expose the drive: Remove any shielding or internal metal brackets securing the internal hard disk assembly
Replacing the Hard Drive
- Disconnect cables: Unplug the SATA data and power connector cables from the failing hard drive.
- Unscrew the drive: Remove the screws holding the hard drive to the internal caddy or frame.
- Mount the new drive: Place the replacement SATA hard drive into the bracket and secure it with the screws.
- Reconnect cables: Firmly plug the SATA data and power cables back into the new drive.
- Reassemble: Snap the outer plastic case back together
Reconfiguring the Device
- Interface: SATA I, SATA II, or SATA III (The internal connector is SATA II, but modern SATA III drives are backwards compatible). [1, 2, 3, 4, 5]
- Form Factor: Standard 3.5-inch desktop drive. [1]
- Maximum Capacity Limit: 1 TB or 2 TB max. The operating system and motherboard inside this legacy unit do not support modern "Advanced Format" (4Kn/512e) partition layouts or capacities above 2 TB. A 1 TB drive is highly recommended to guarantee compatibility. [1, 2, 3, 4]
- Drive Class: Choose a 5,400 RPM or 7,200 RPM mechanical hard drive. Avoid Solid State Drives (SSDs), as the legacy Linux operating system inside the Central Axis lacks TRIM support and will prematurely wear an SSD down. [1, 2, 3, 4]
- Method A (Sector-by-Sector Clone): If your current Maxtor drive is still spinning and functioning (but failing), connect both the old drive and the new drive to a computer. Use cloning software to perform a sector-by-sector clone of the entire drive. This transfers the hidden Linux system partitions and firmware version 3.5.74 directly to the new drive. Afterwards, you can use a partition manager to expand the storage partition if the new drive is larger. [1, 2, 3, 4, 5]
- Method B (TFTP Firmware Flash): If the original drive is completely dead, a blank drive requires an advanced unbricking procedure. You will have to connect the NAS motherboard to your computer via an Ethernet cable, set a static IP, and use a TFTP server tool on your computer to push the raw Maxtor firmware files onto the new drive during its initial boot sequence.
Replacing Dead Drives or Extending from 1 Tbyte to 2 Tbyte Drives
Issue
In may case I have multiple Central Axis drives where some of the drives are starting to fail and therfore need to be replaced and cloning of one of my working drives appears to be an option.
The Fix
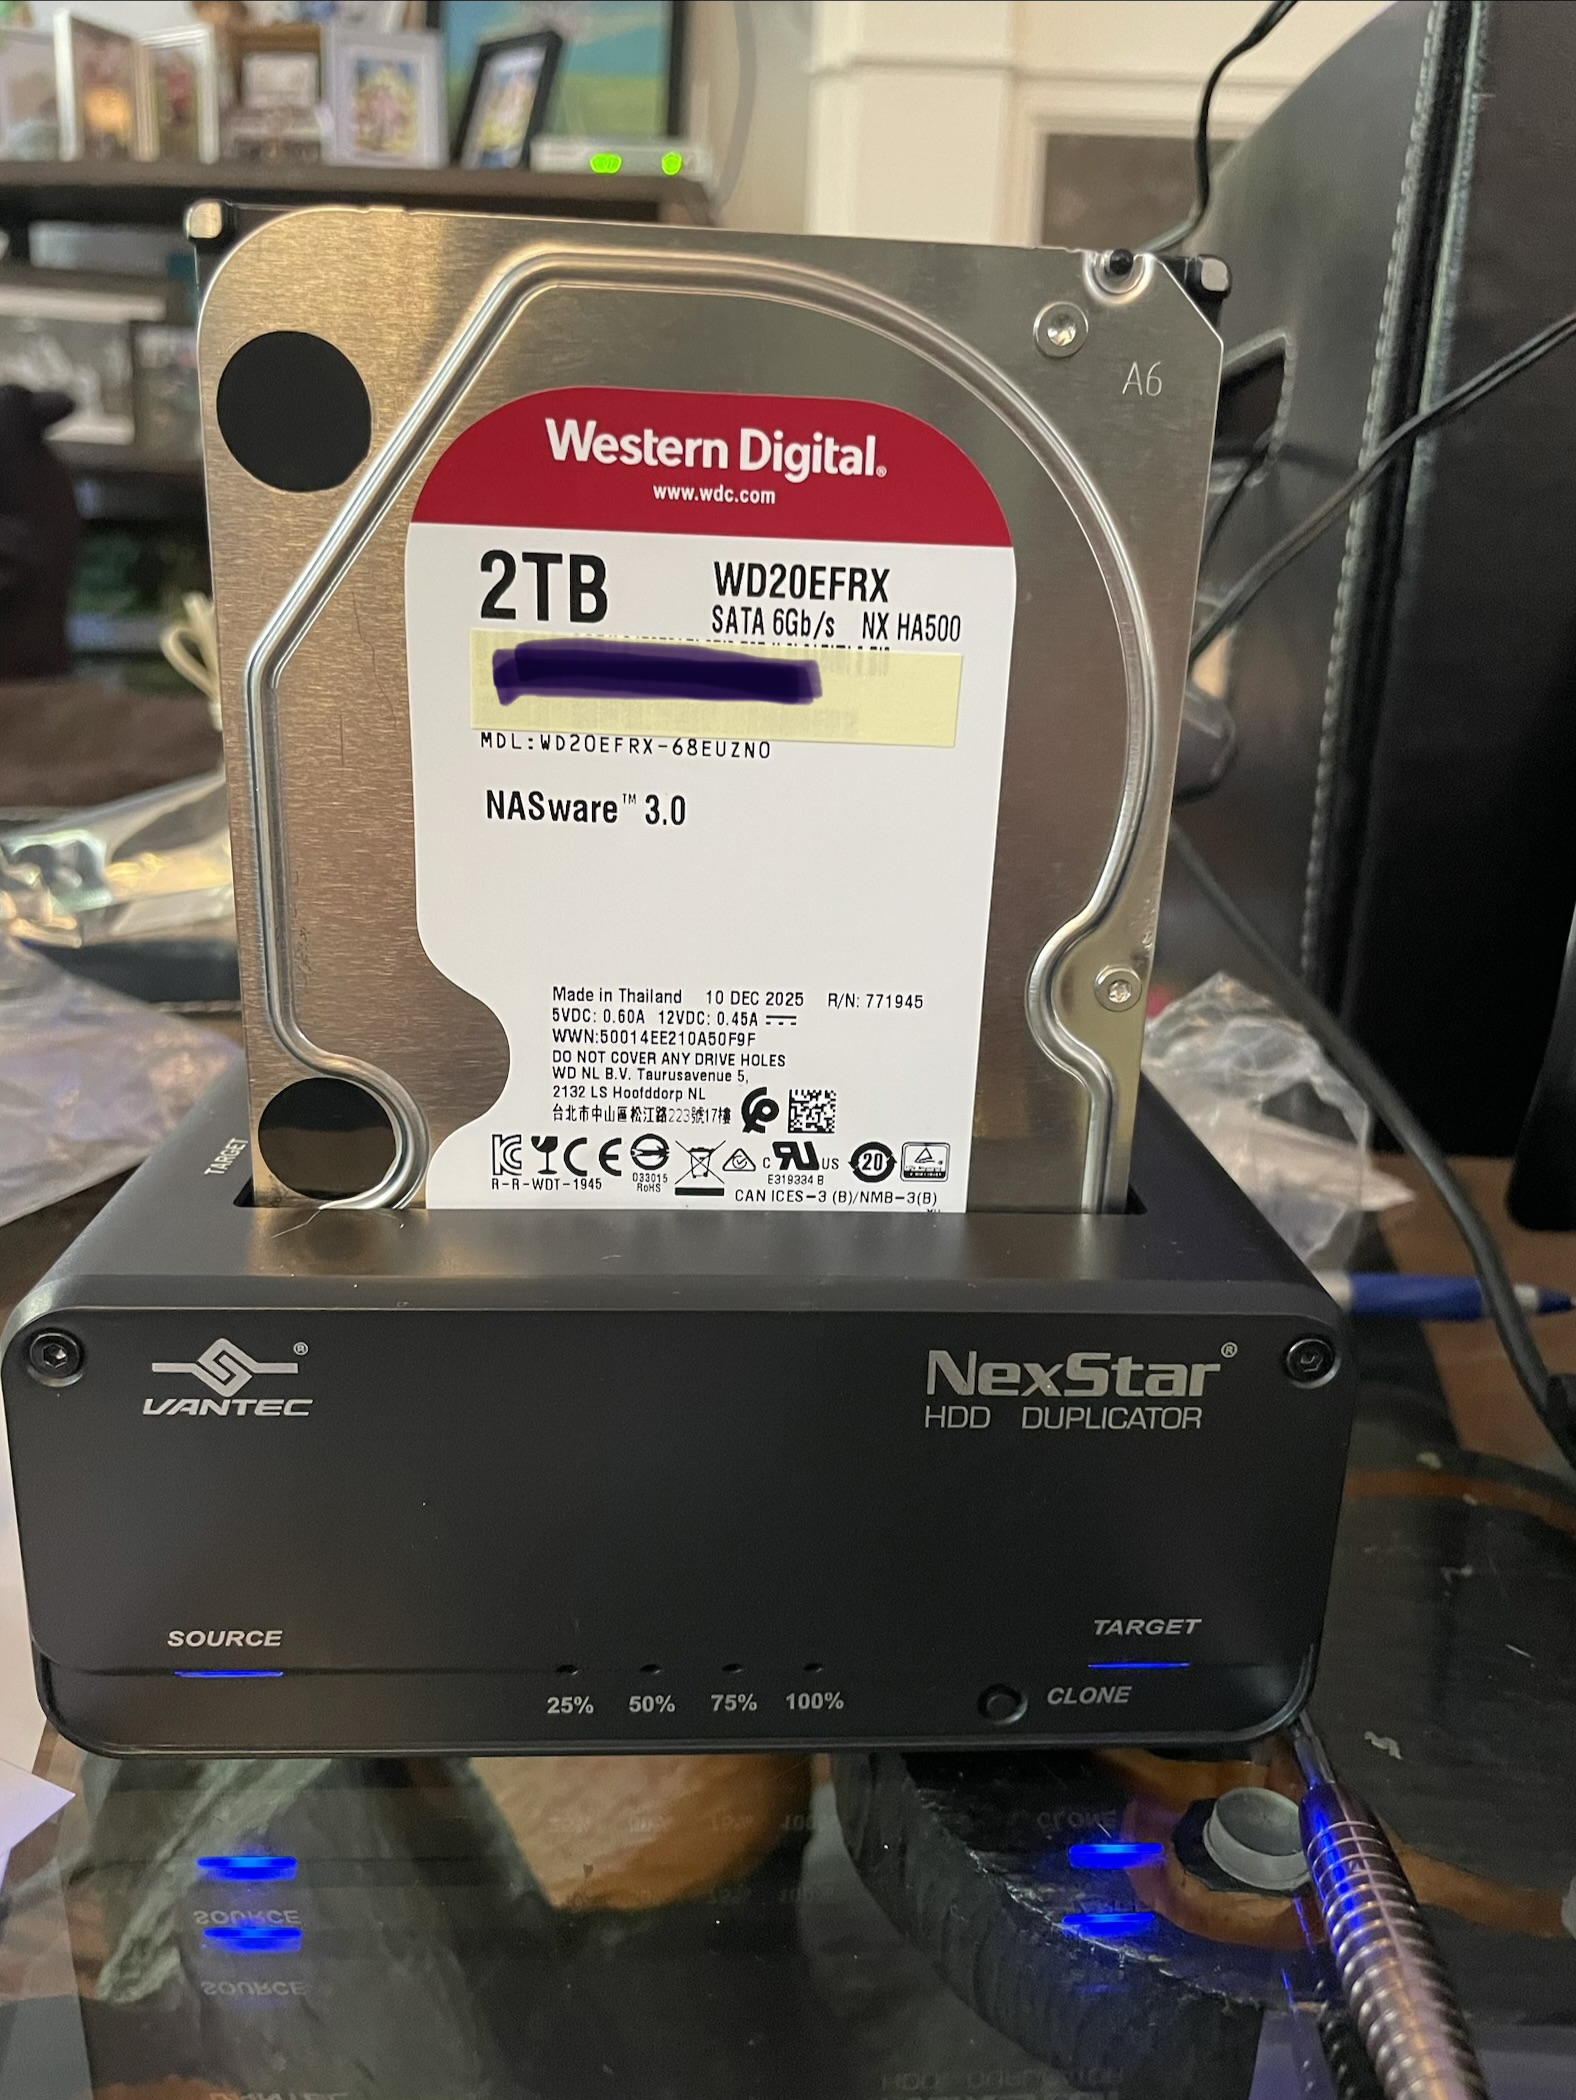
Since the Central Axis relies on its drive for the operating system that is located on a hidden partition, the easiest solution is to use a sector-sector drive cloning device and copy an image of the internal 1 TByte drive from a working drive onto a 2 Tbyte (max size for these old units) replacement drive. Then use the built-in Windows partition manager to extend the partition to utilize the extra 1 Tbyte of space. To make things simple, I decided to purchase a Western Digital NAS RED 2 Tbyte drive and a Vantec Nexstar Drive Cloning ($44.99 + tax from Canada Computers) device that allows for simple offline "one touch" sector-sector cloning of SATA drives.
Vantec NexStar JX
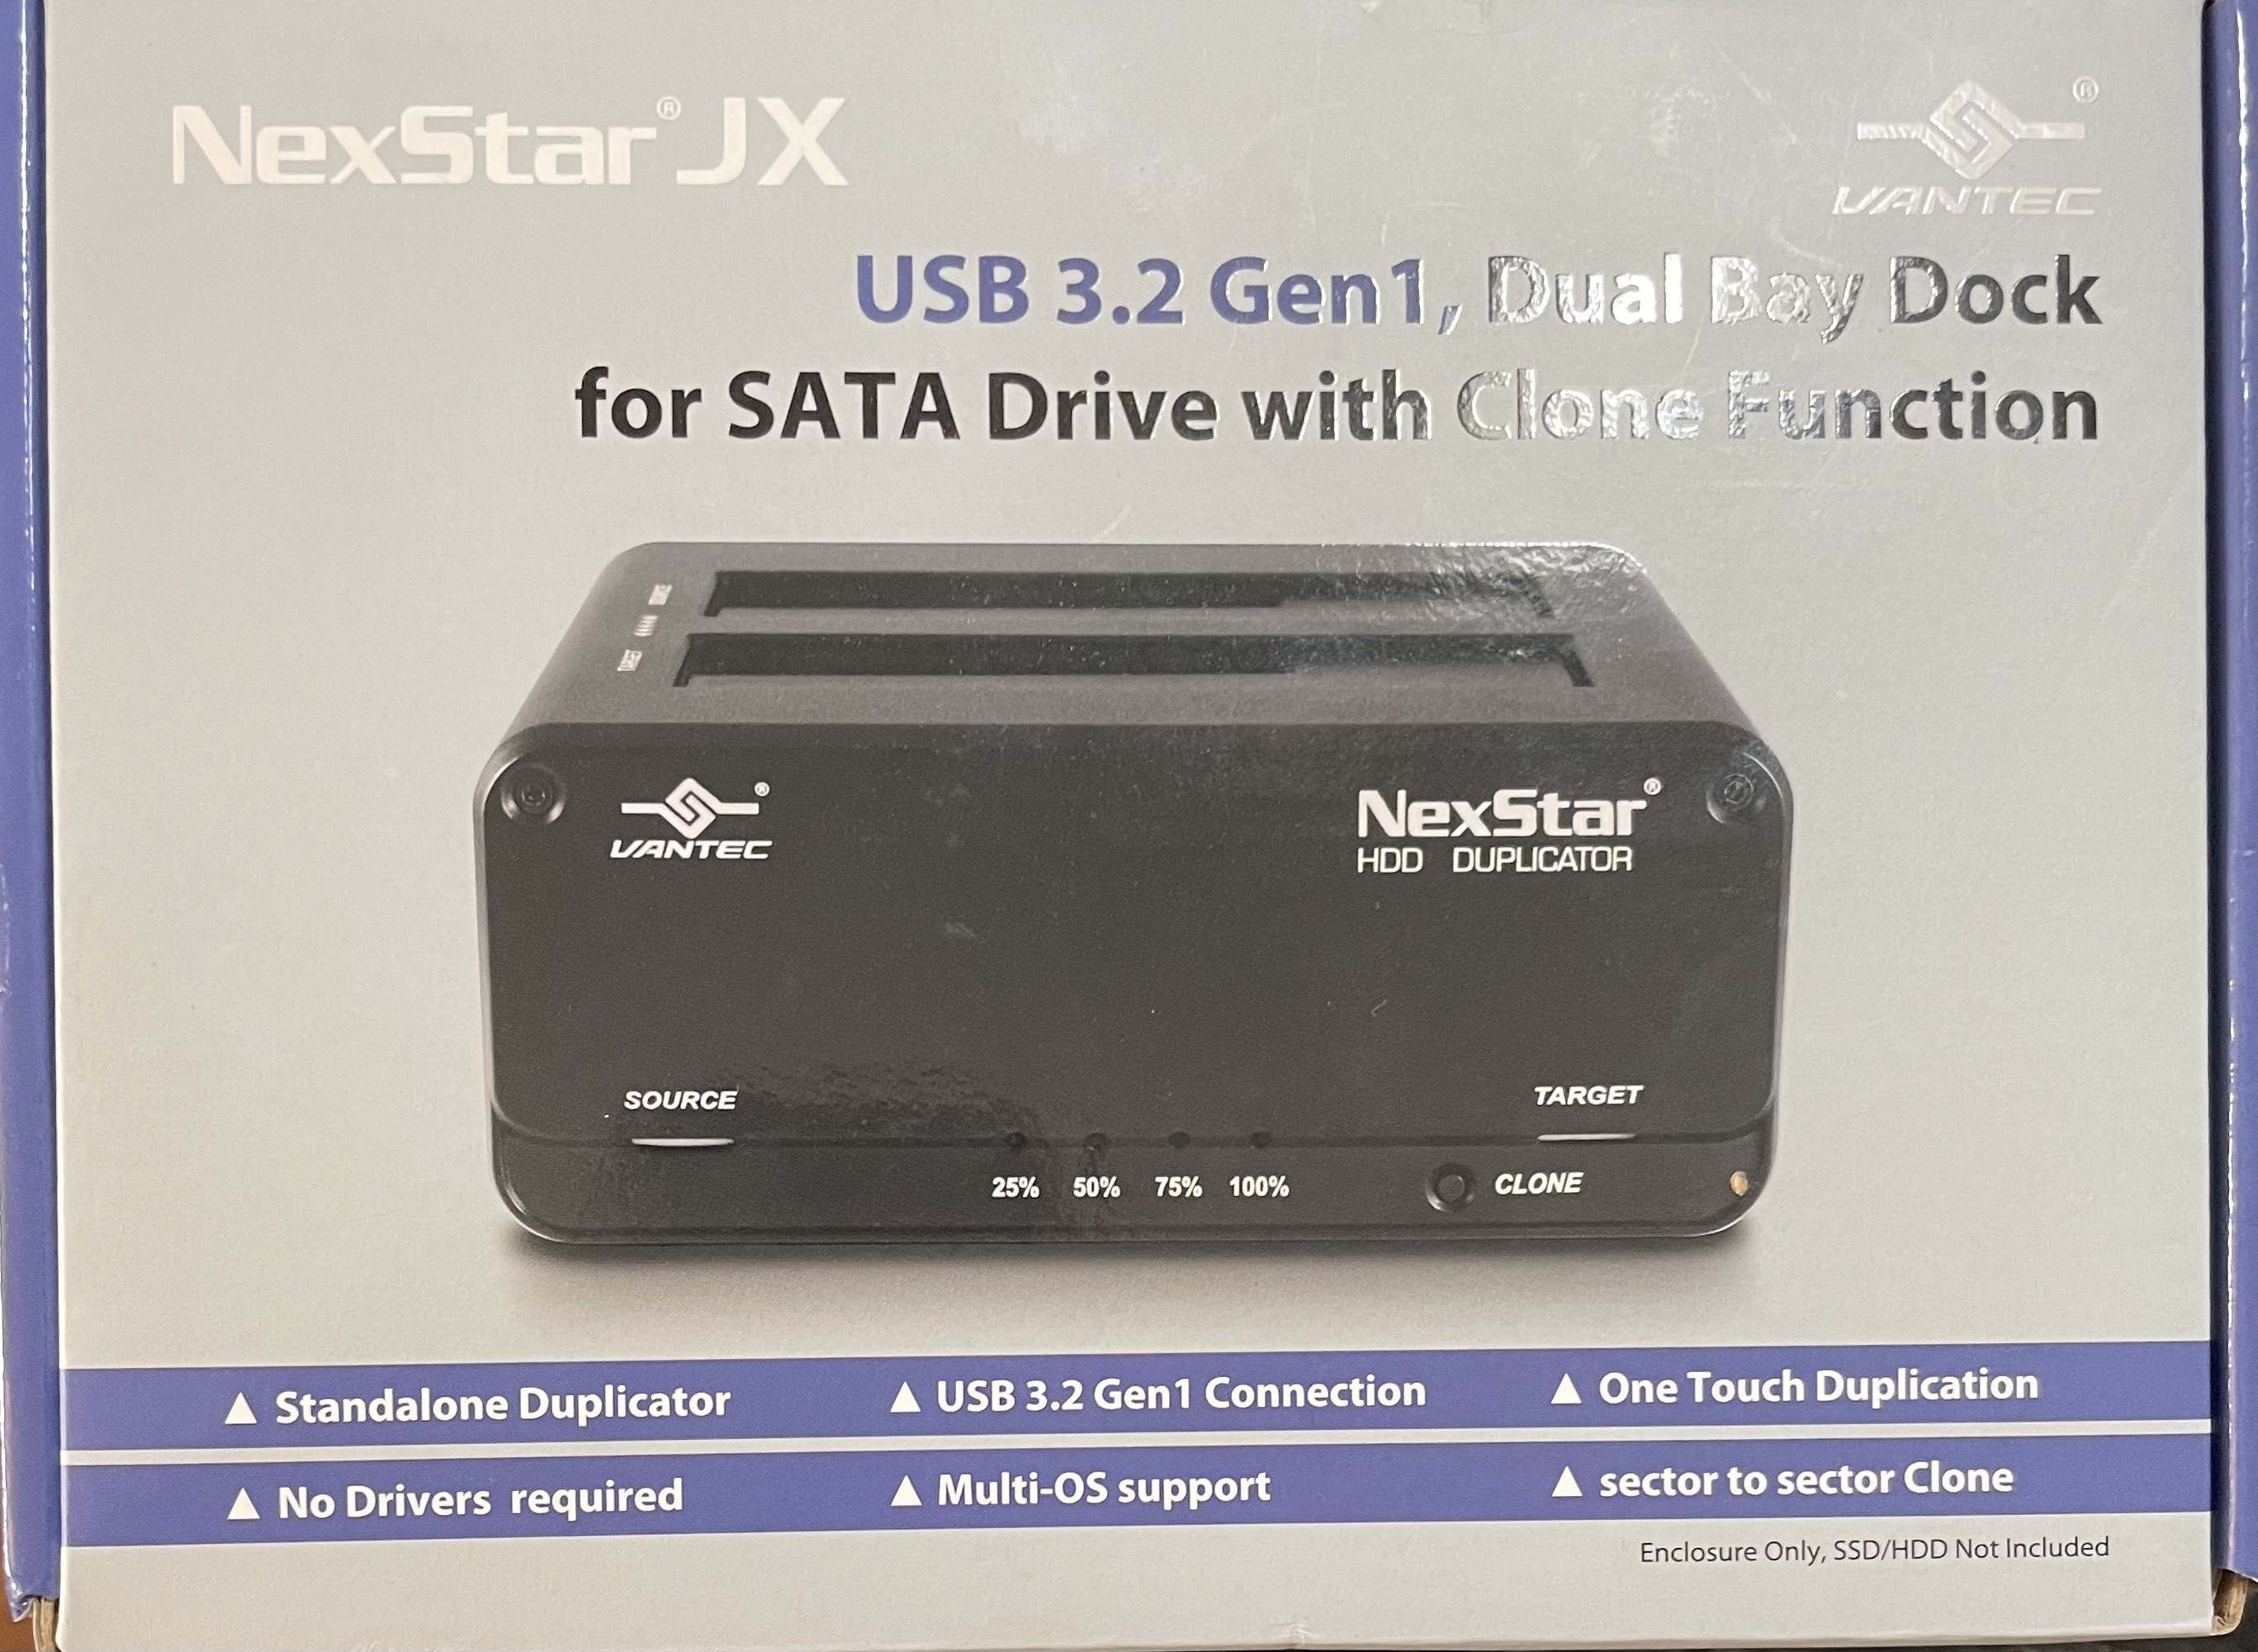
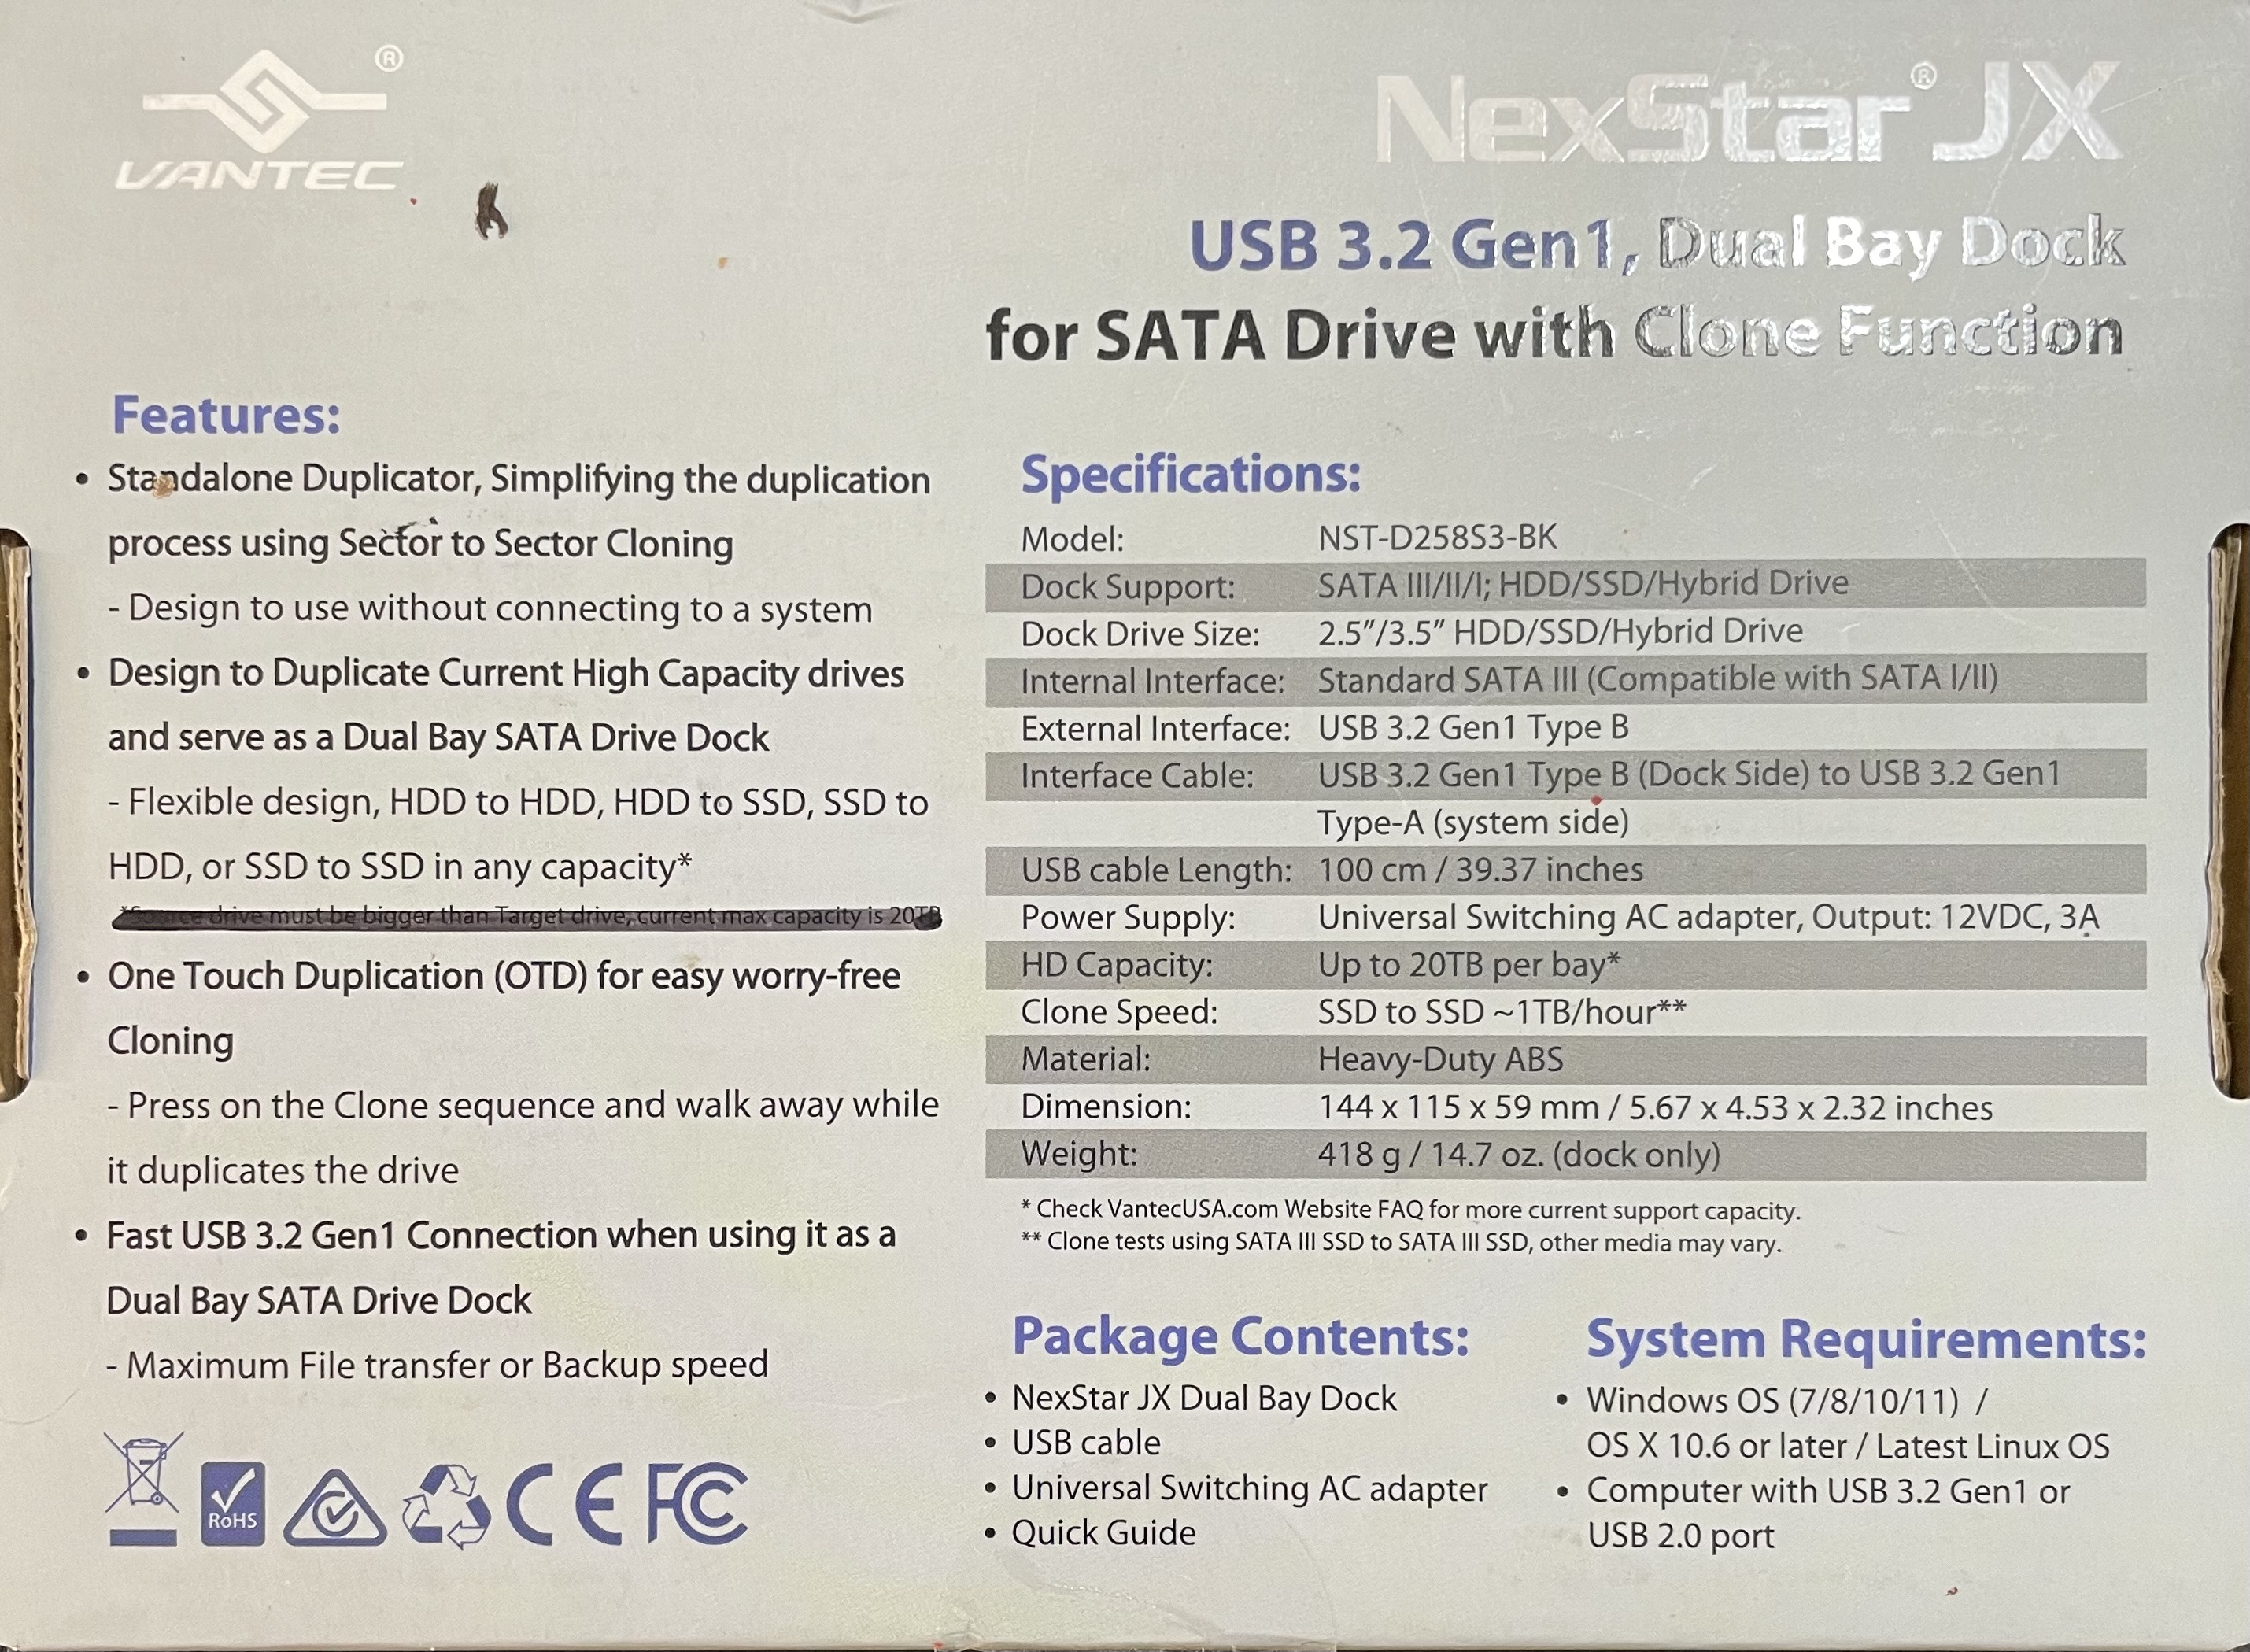
I also ordered a 2Tbyte 5400 RPM Western Digital (WD) Red NAS drive from China ($118.89) to do the test with.
Western Digital (WD) Red 2 Tbyte NAS Drive (WD20EFRX)
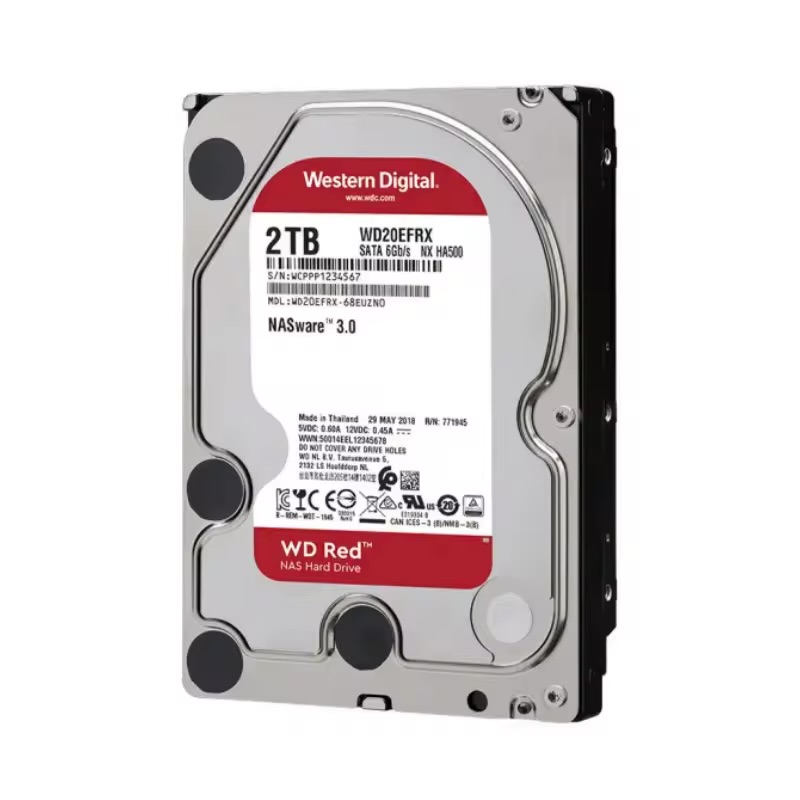
- High-Capacity NAS-Optimized Storage Designed for NAS systems, the
WD Red HDD offers reliable performance with capacities up to 6TB, ideal for data-intensive home or small business storage needs. - 5400RPM for Balanced Performance Equipped with a 5400RPM speed, this internal hard drive delivers efficient data transfer while maintaining low power consumption and reduced heat output.
- SATA 6Gb/s Interface for Fast Connectivity Featuring a SATA 3.0 interface with
6Gb/s transfer speed, this drive ensures fast and stable data access for seamless file sharing and backup operations. - 64MB Cache for Enhanced Efficiency With a 64MB cache, the drive improves data retrieval speed and overall system responsiveness, especially during heavy read/write workloads.
- Reliable for 24/7 Operation Built for continuous use, this 3.5-inch internal HDD supports
24/7 operation, making it perfect for NAS environments requiring long-term stability and durability. - Compatible with Multiple Models Available in 1TB, 2TB, 3TB, 4TB, and 6TB variants, with model numbers
WD10EFRX, WD20EFRX, WD30EFRX, WD40EFRX, WD60EFRX, ensuring compatibility with various NAS setups. - CE Certified for Safety and Compliance Certified with CE, this drive meets European safety and environmental standards, ensuring reliable and compliant performance in diverse operating environments.
How to Test the New Drive - CystalDiskInfo
Use CrystalDiskInfo to check the new drive. It is a free, open-source disk health monitoring utility for Windows that reads S.M.A.R.T. data to check the status, temperature, and performance of HDDs, SSDs, and NVMe drives
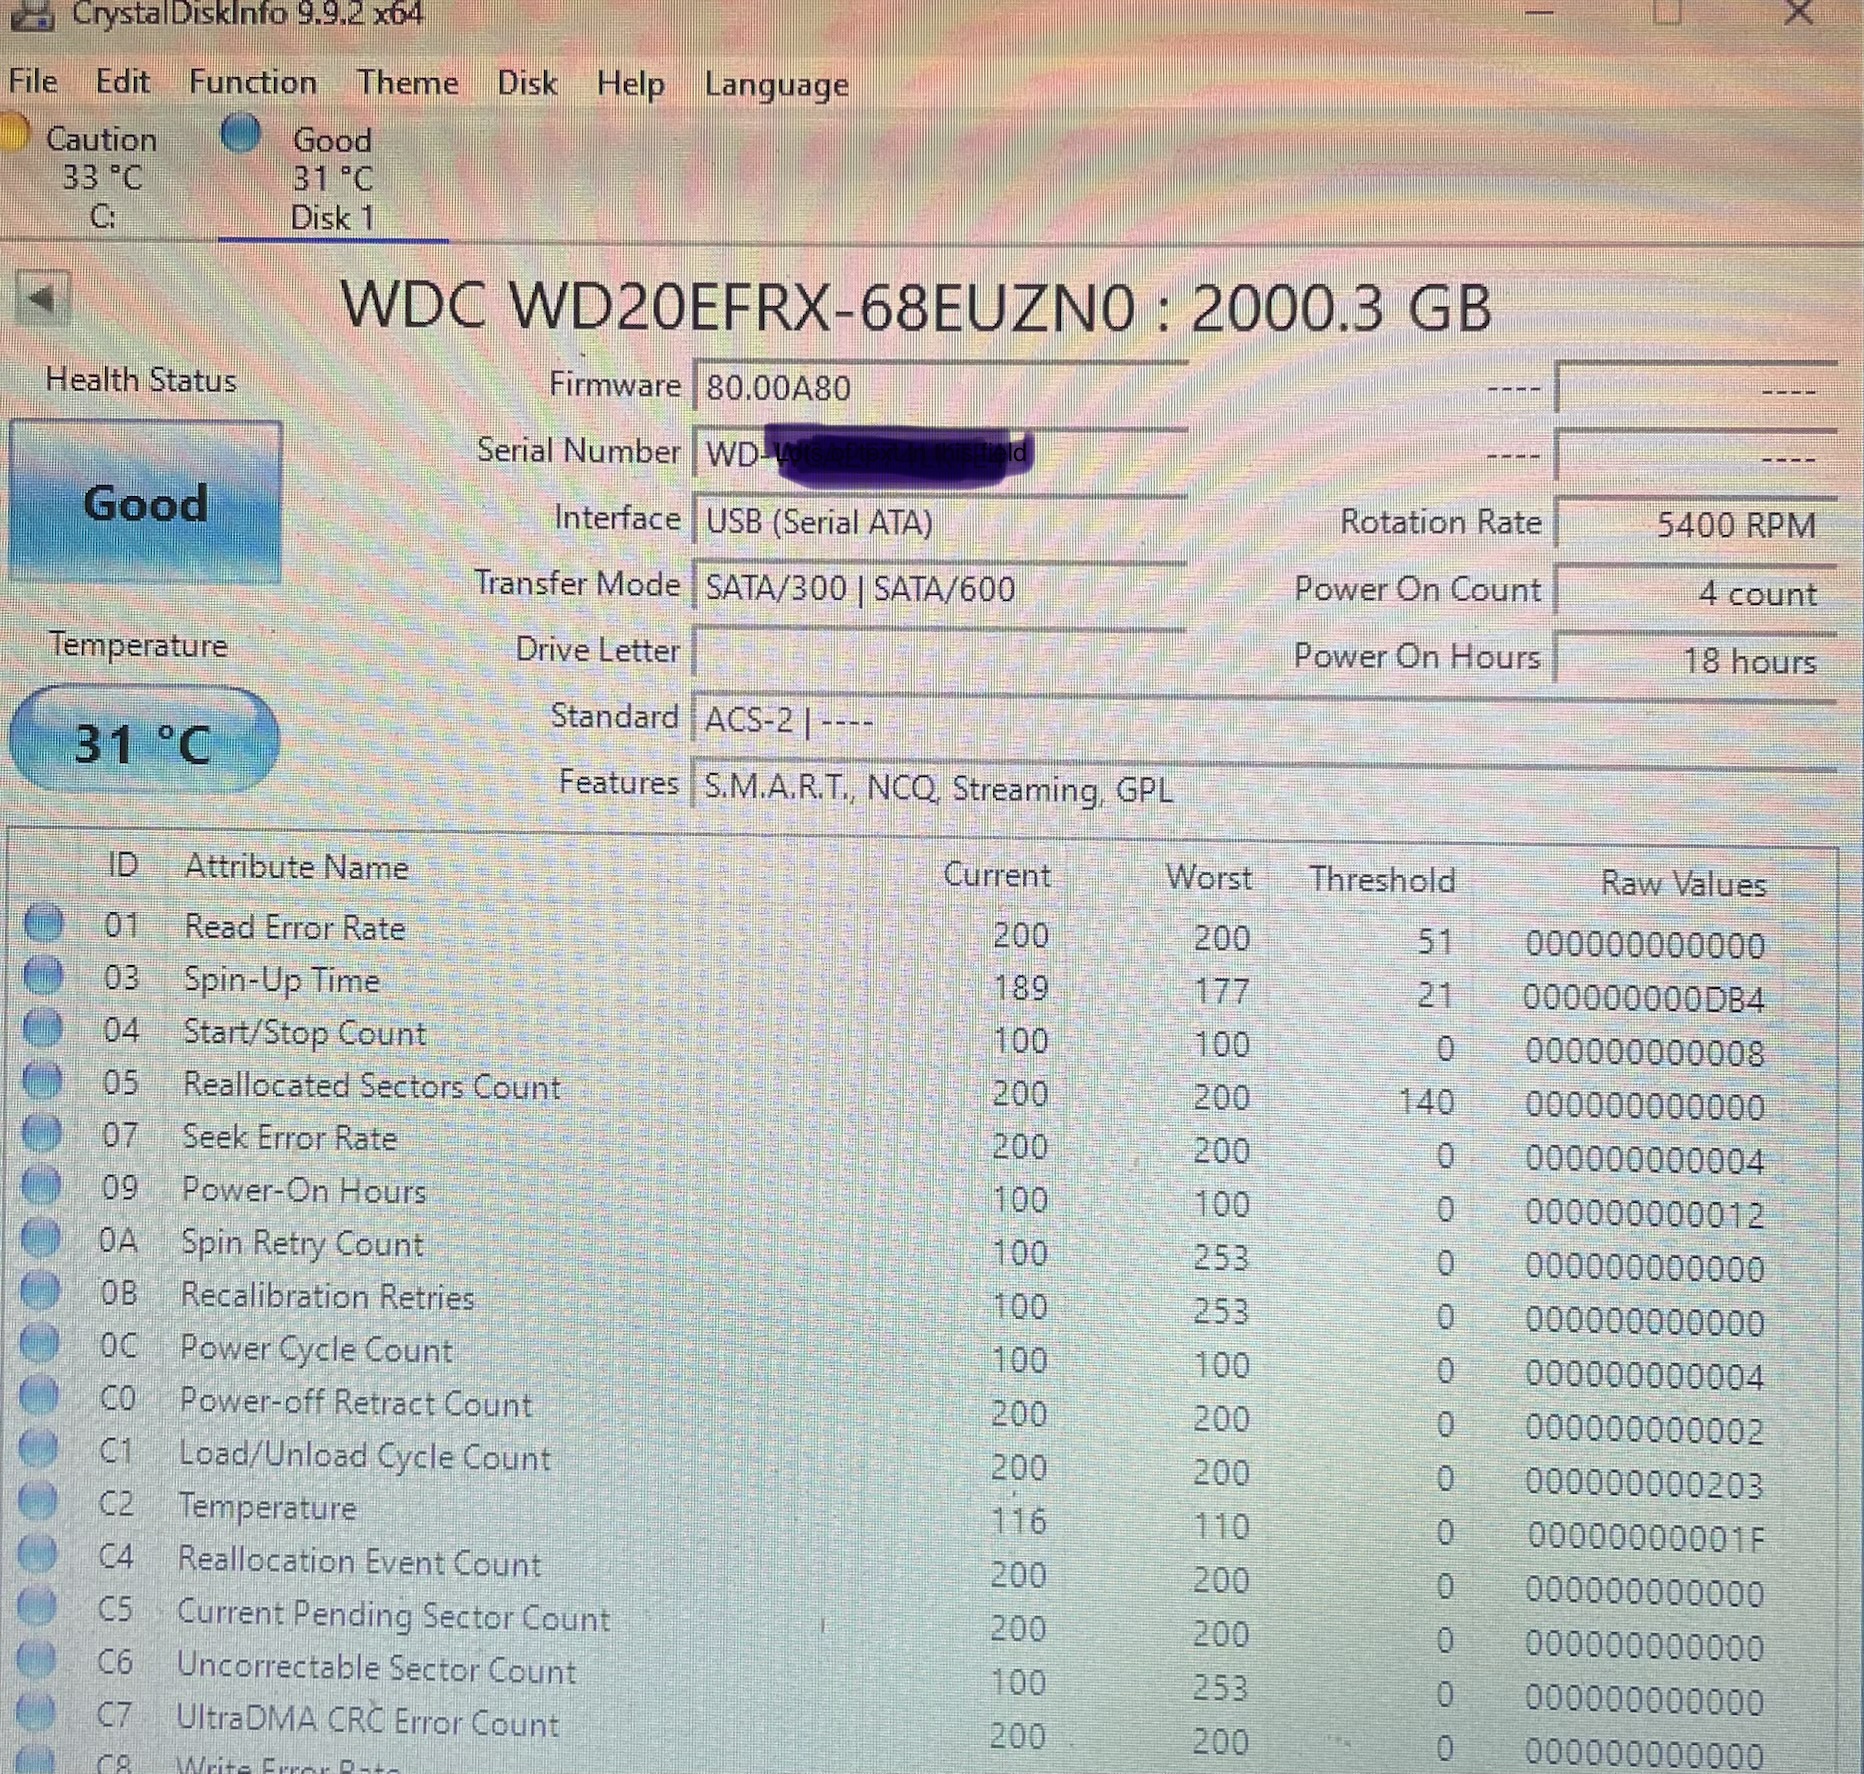
The Drive that I received was tested and "passed" with flying colours. Time to clone the data to the drive and extend the user data partition to utilize the extra 1 Tbyte.
Detailed Drive Disassembly and “Root Cause” for Why These Drives Are NOT Easily Repaired!
This drive is NOT designed to be taken apart. In fact the drive chassis has a heat sink attached on either side - that means that the drive chassis's no longer slides out as originally designed for the case. As such, you have to remove the aluminum side panels on the drive in order to remove the heat sinks, and then slide out the internals for the drive. I suspect that these heat sinks were an “addition” or “afterthought” added to try to manage/dissipate the heat concerns for these drives. However, in adding these heat sinks they destroyed any opportunity to easily repair or replace the drives in these units.
Here are the Offending Heat Sinks
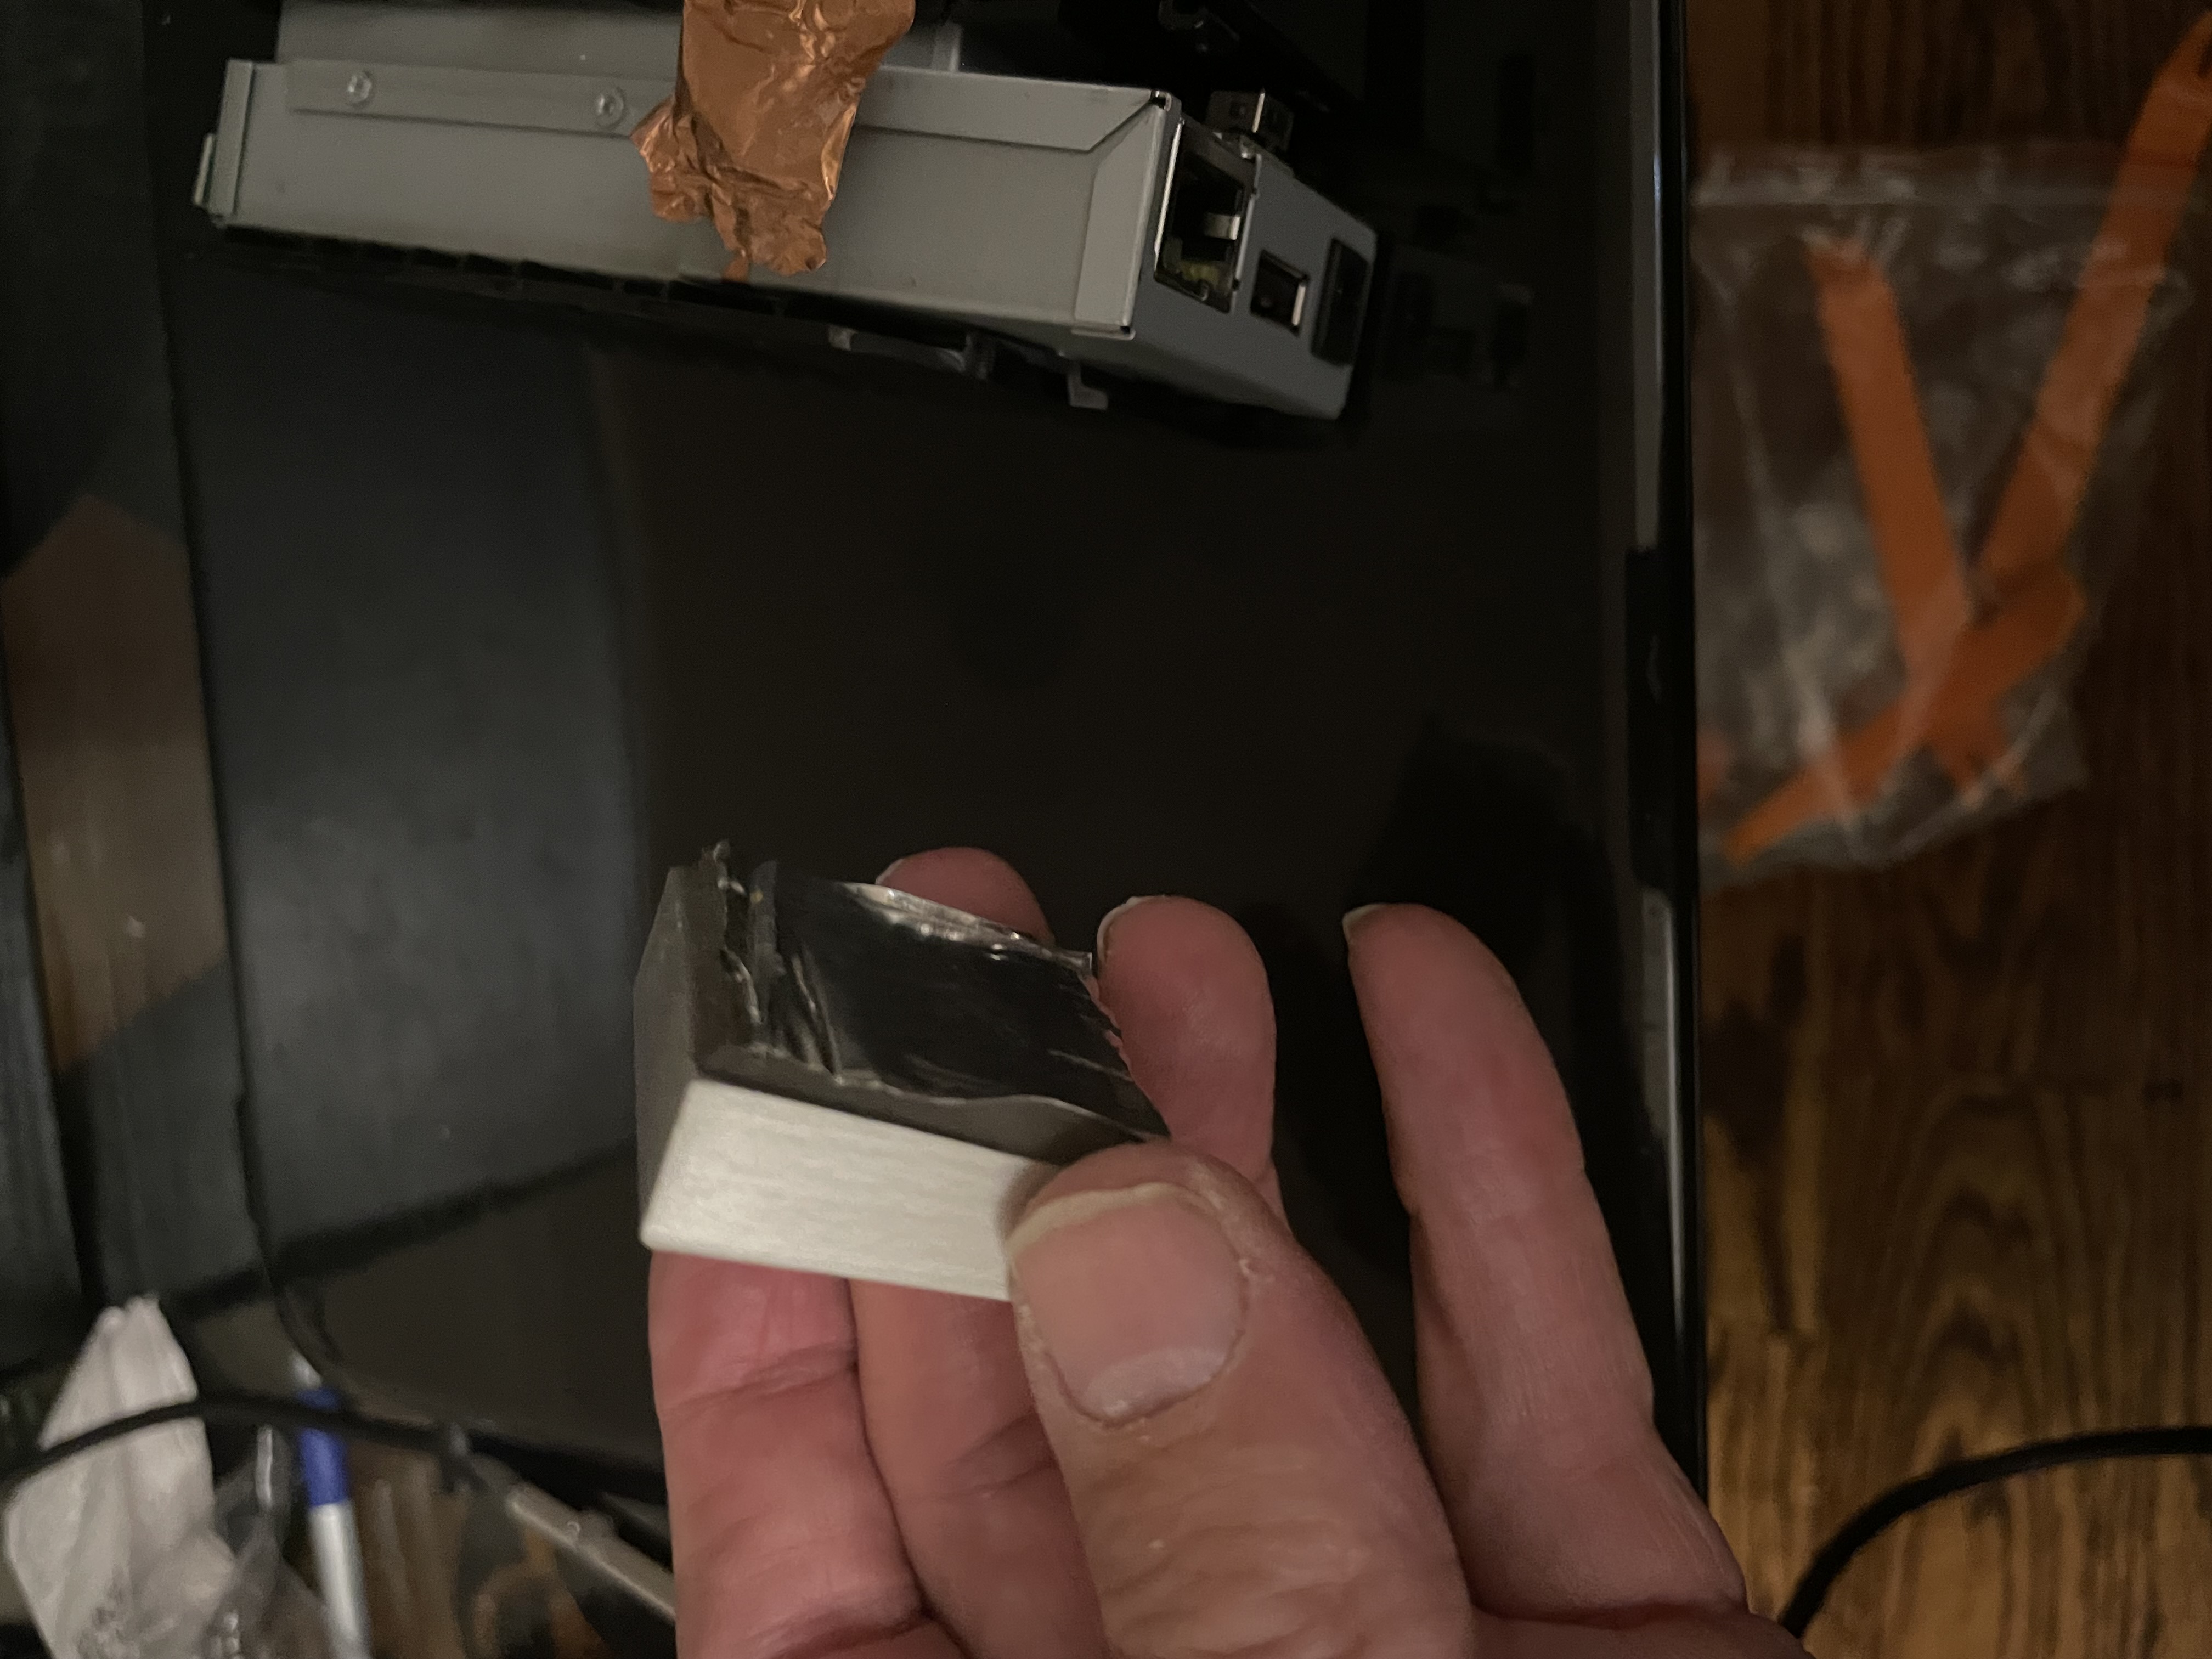
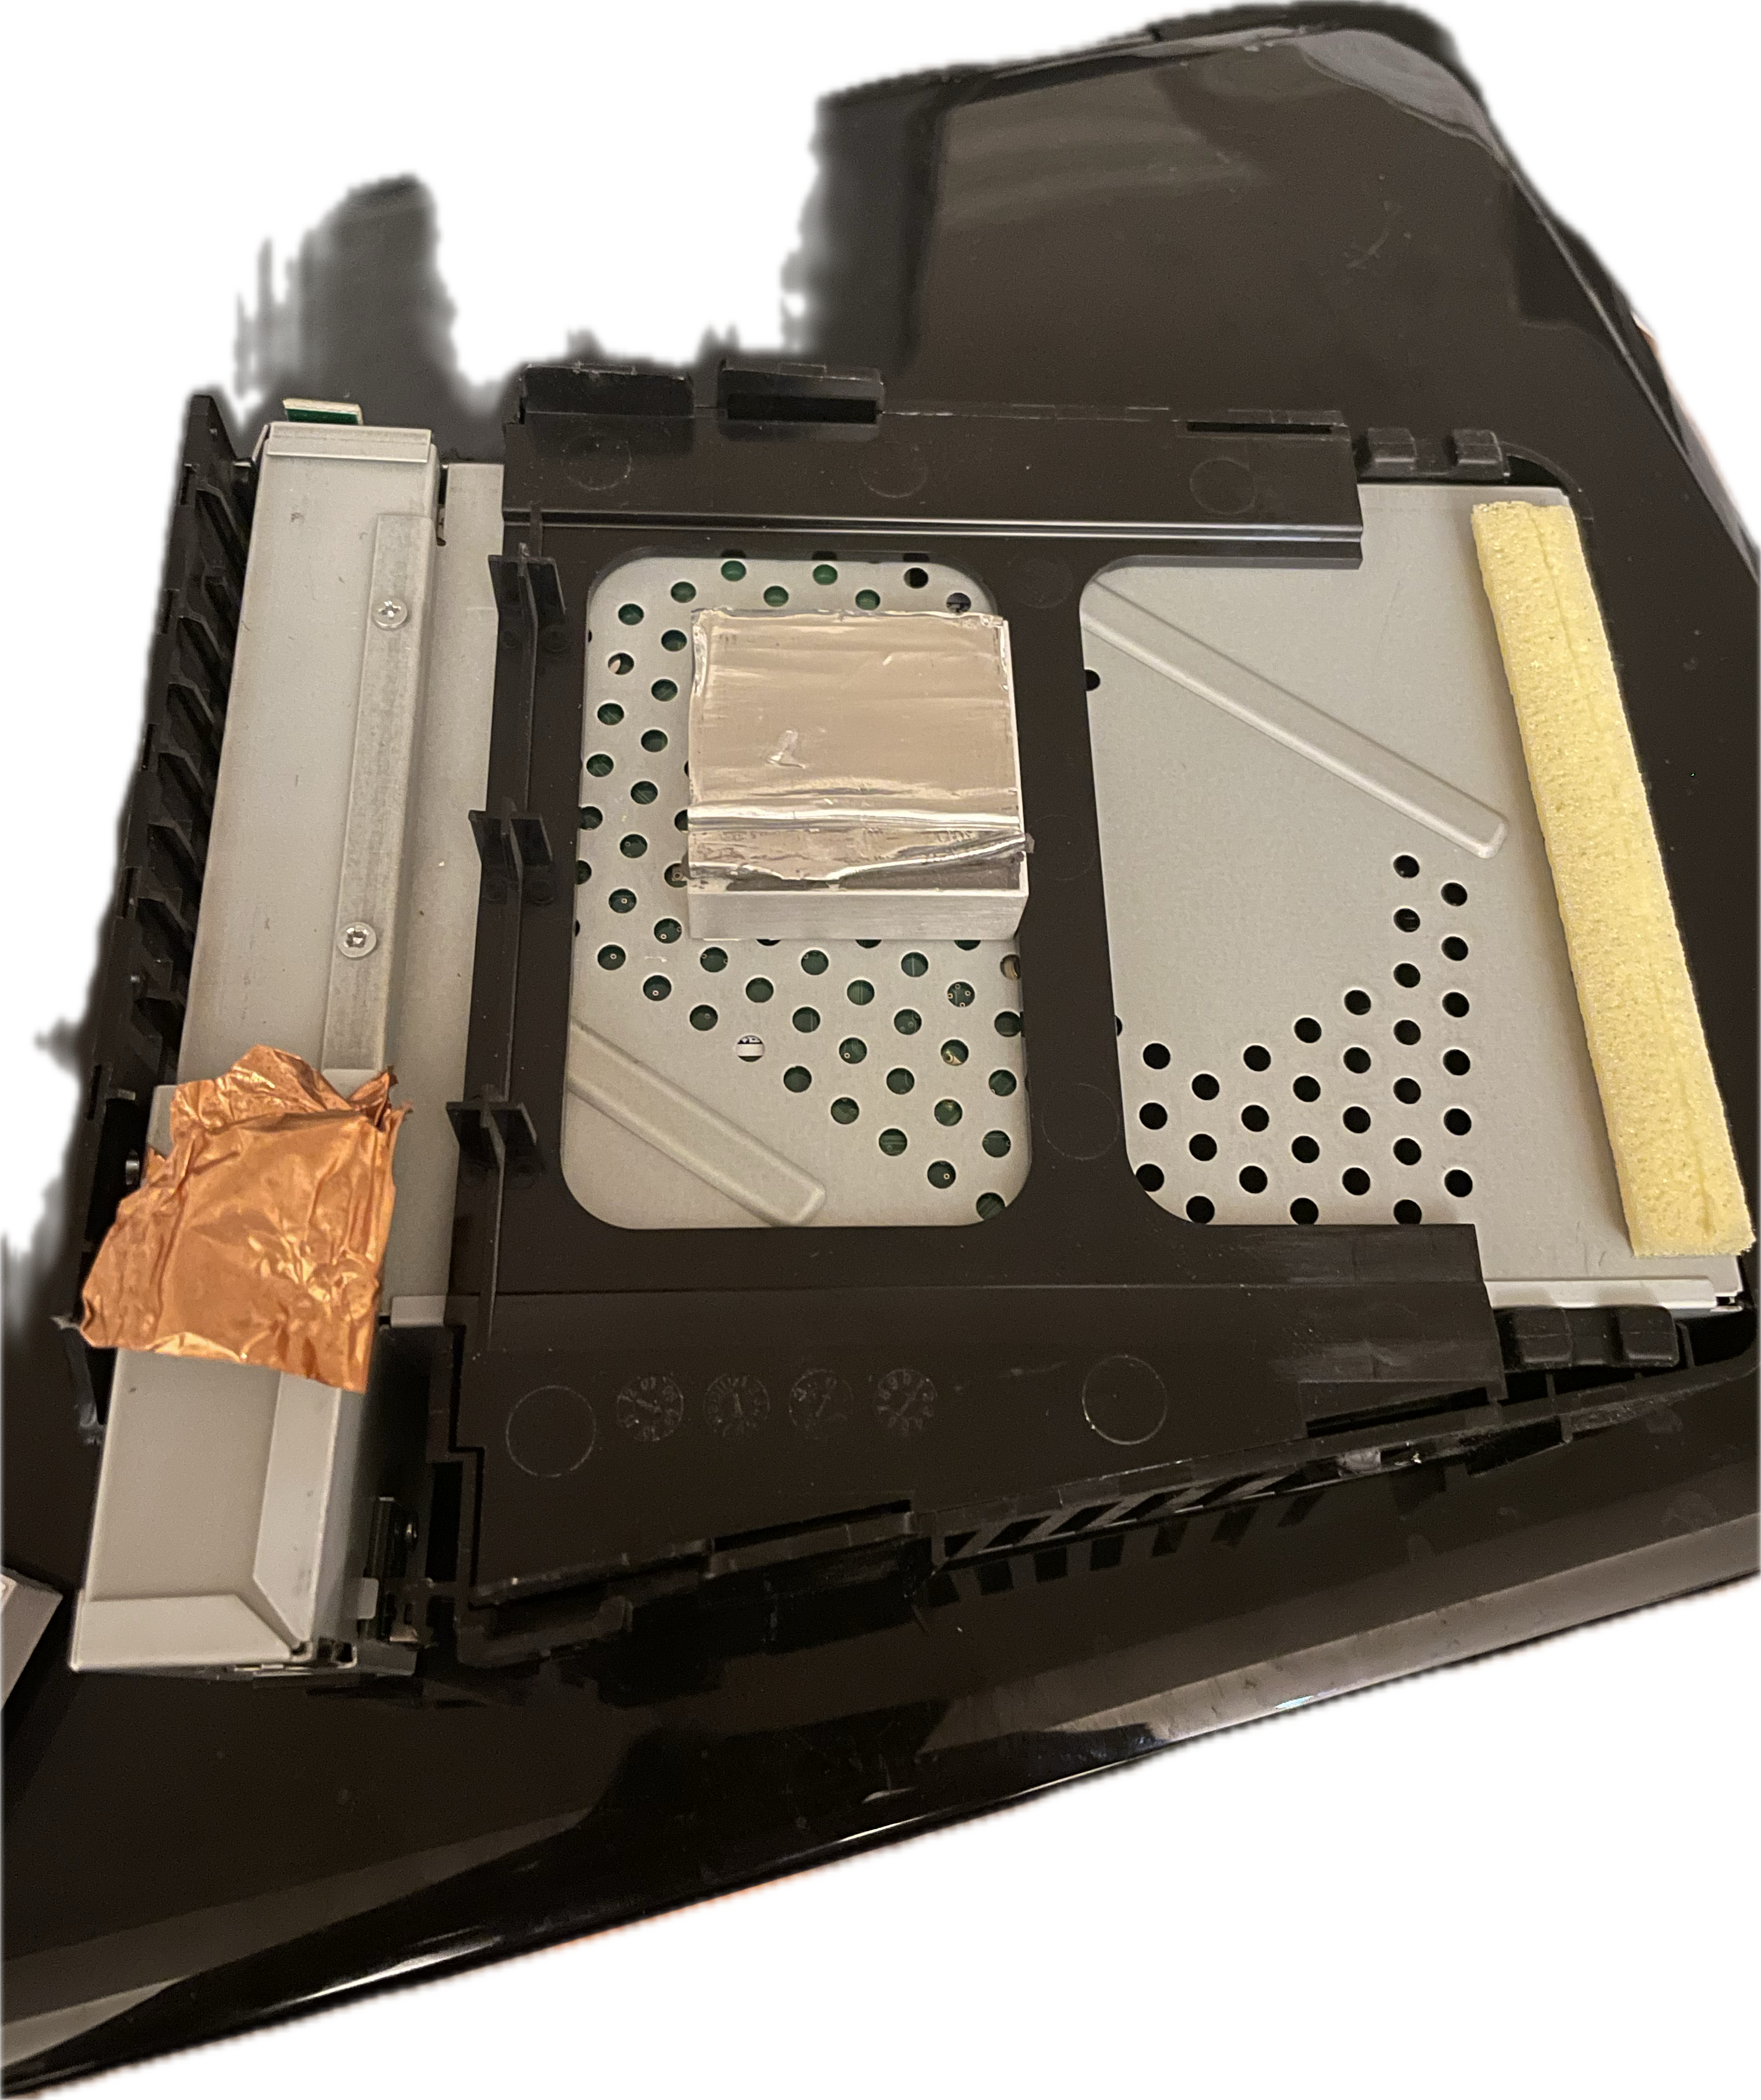
The heat sink is about a 2”x2” and 1/2” thick and physically “glued” with thermal paste to the aluminum case so when you take the screws out the drive starts to slide out nicely but then the heat sinks act like an internal stopper that won’t let it proceed all the way out. There is no documentation on this issue that I could find - so eventually I basically butchered the drive to find out the reason (root cause) for why you cannot disassemble these drives and why you were required to “RMA” them to the manufacturer when they failed. Of course these devices are now way out of any warranty period so I had to figure out a solution on my own now that all my drives are failing.
Now that I understand this heat sink “feature” or more accurately the “design flaw” - I can more easily repair my other drives without butchering the case.
Here is the Maxtor with the side panels peeled off - and the heat sinks and internals now exposed/removed.
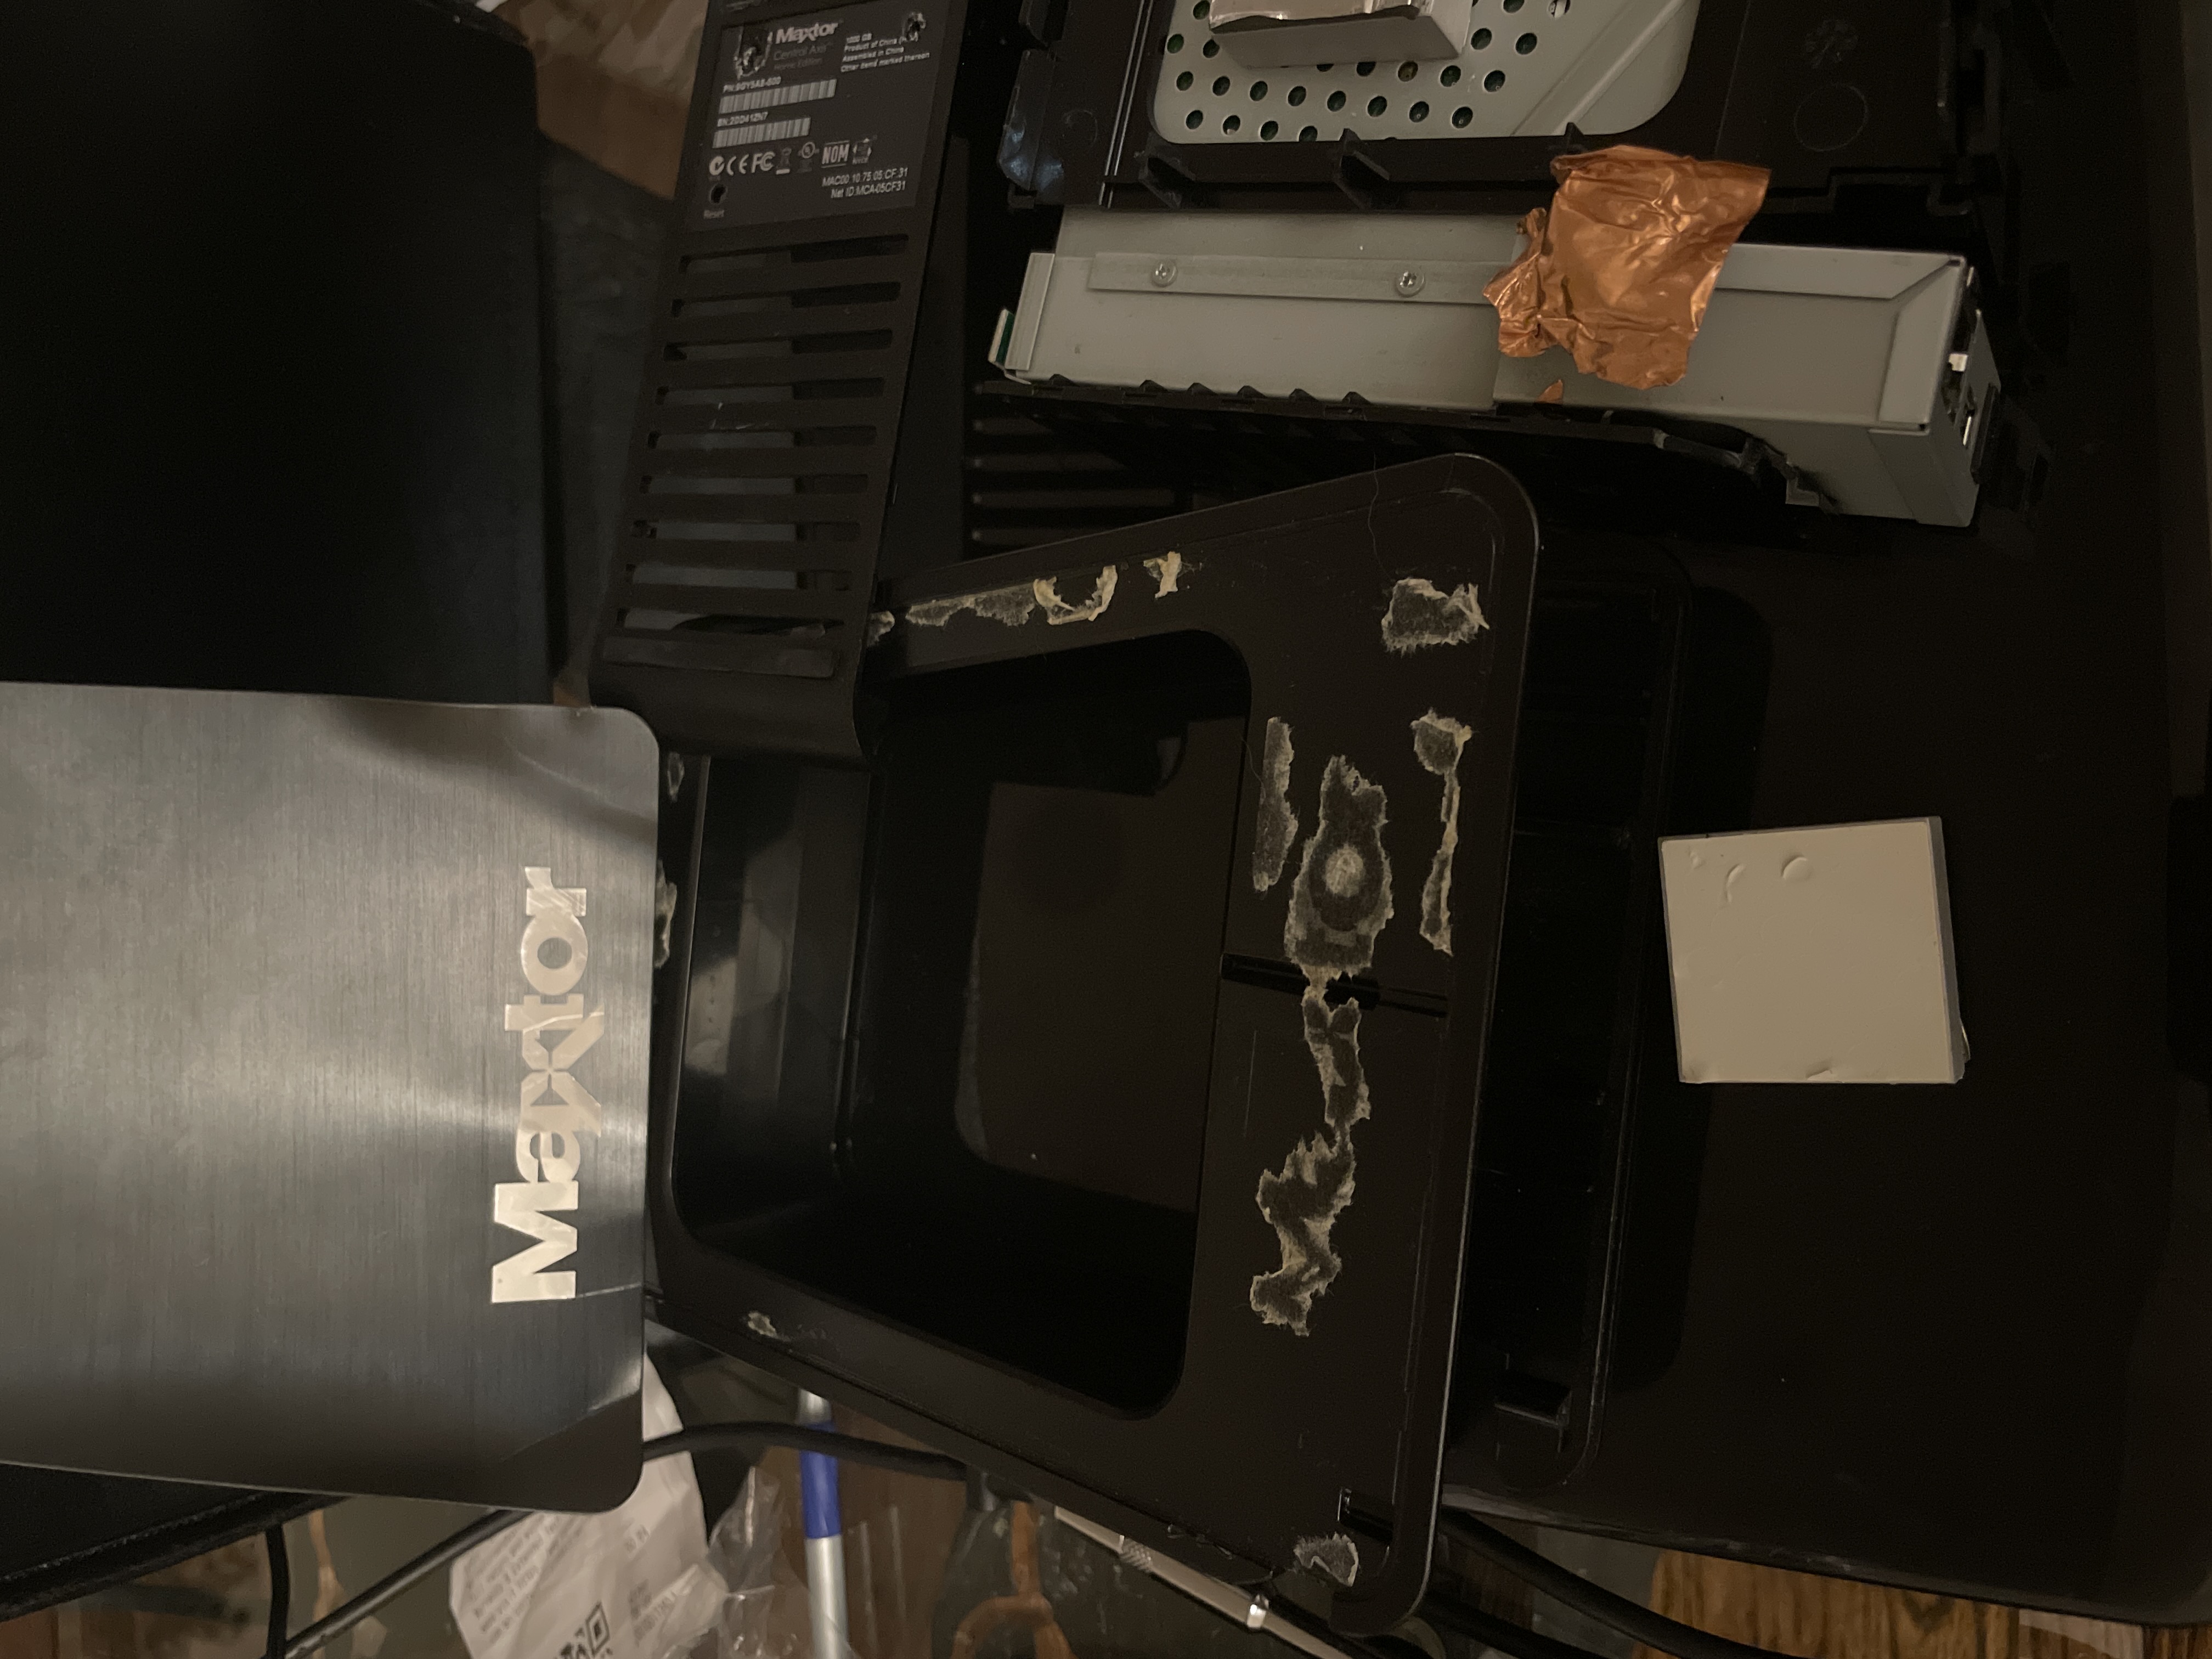
Next step is to remove and clone the drive, hopefully then I will be able to extend the partition from 1 to 2 Tbytes.
Hard Drive Removal Steps:
- Power down and disconnect the drive
- Use a prey tool and remove the side aluminum side panels
- Remove the two heat sinks (one on each side glued to cage)
- On the bottom of the drive remove 4 hidden screws
- 2 under label
- 2 under corners of rubber feet
- Remove the plastic cases and the plastic plate that displays the led lights
- Remove the silver screws holding the cage and now you should be able to freely slide out the cage
- remove the screws holding the cage together
- unplug teo wires and take apart the cage
Cloning Underway
Important: because these legacy devices are formatted Ext3 with a 1 KByte Block size you are limited to a 2 TByte maximum partition size and a 16 Gbyte max file size. This means that you can use a 3 TByte drive but a lot of available space will be wasted as you can only allocate a max of up to 2 TBytes to the user partition
Cloning succeeded successfully. The challenge now is that the new unallocated 1 Tbyte is not able to be extended to an Ext3 logical partition at the end of the drive.
The Central Axis utilizes 4 primary partitions and 1 Logical partition - all Ext3.
This is the structure:
- Ext3 - 250.9 GB (O/S)
- Ext3 - 251.02 GB (O/S)
- Ext3 - 251.02 GB (Linux Swap)
- Ext3 - 494.16 GB (User Data)
- Ext3Logical - 930.29 GB (Logical)
- Unallocated - 931.56 GB
My Backups, My Photos, Public, etc.).The theory is that by moving the unallocated space ahead of the logical partition and next to the user data partition will make it available to be “extended” to the existing user data partition.
Moving the Unallocated Space
Windows partition manager does not let you easily manage/move partitions so I downloaded a free Partition manager “AOMEI Partition Assistant” to help move the unallocated space around on the disk.
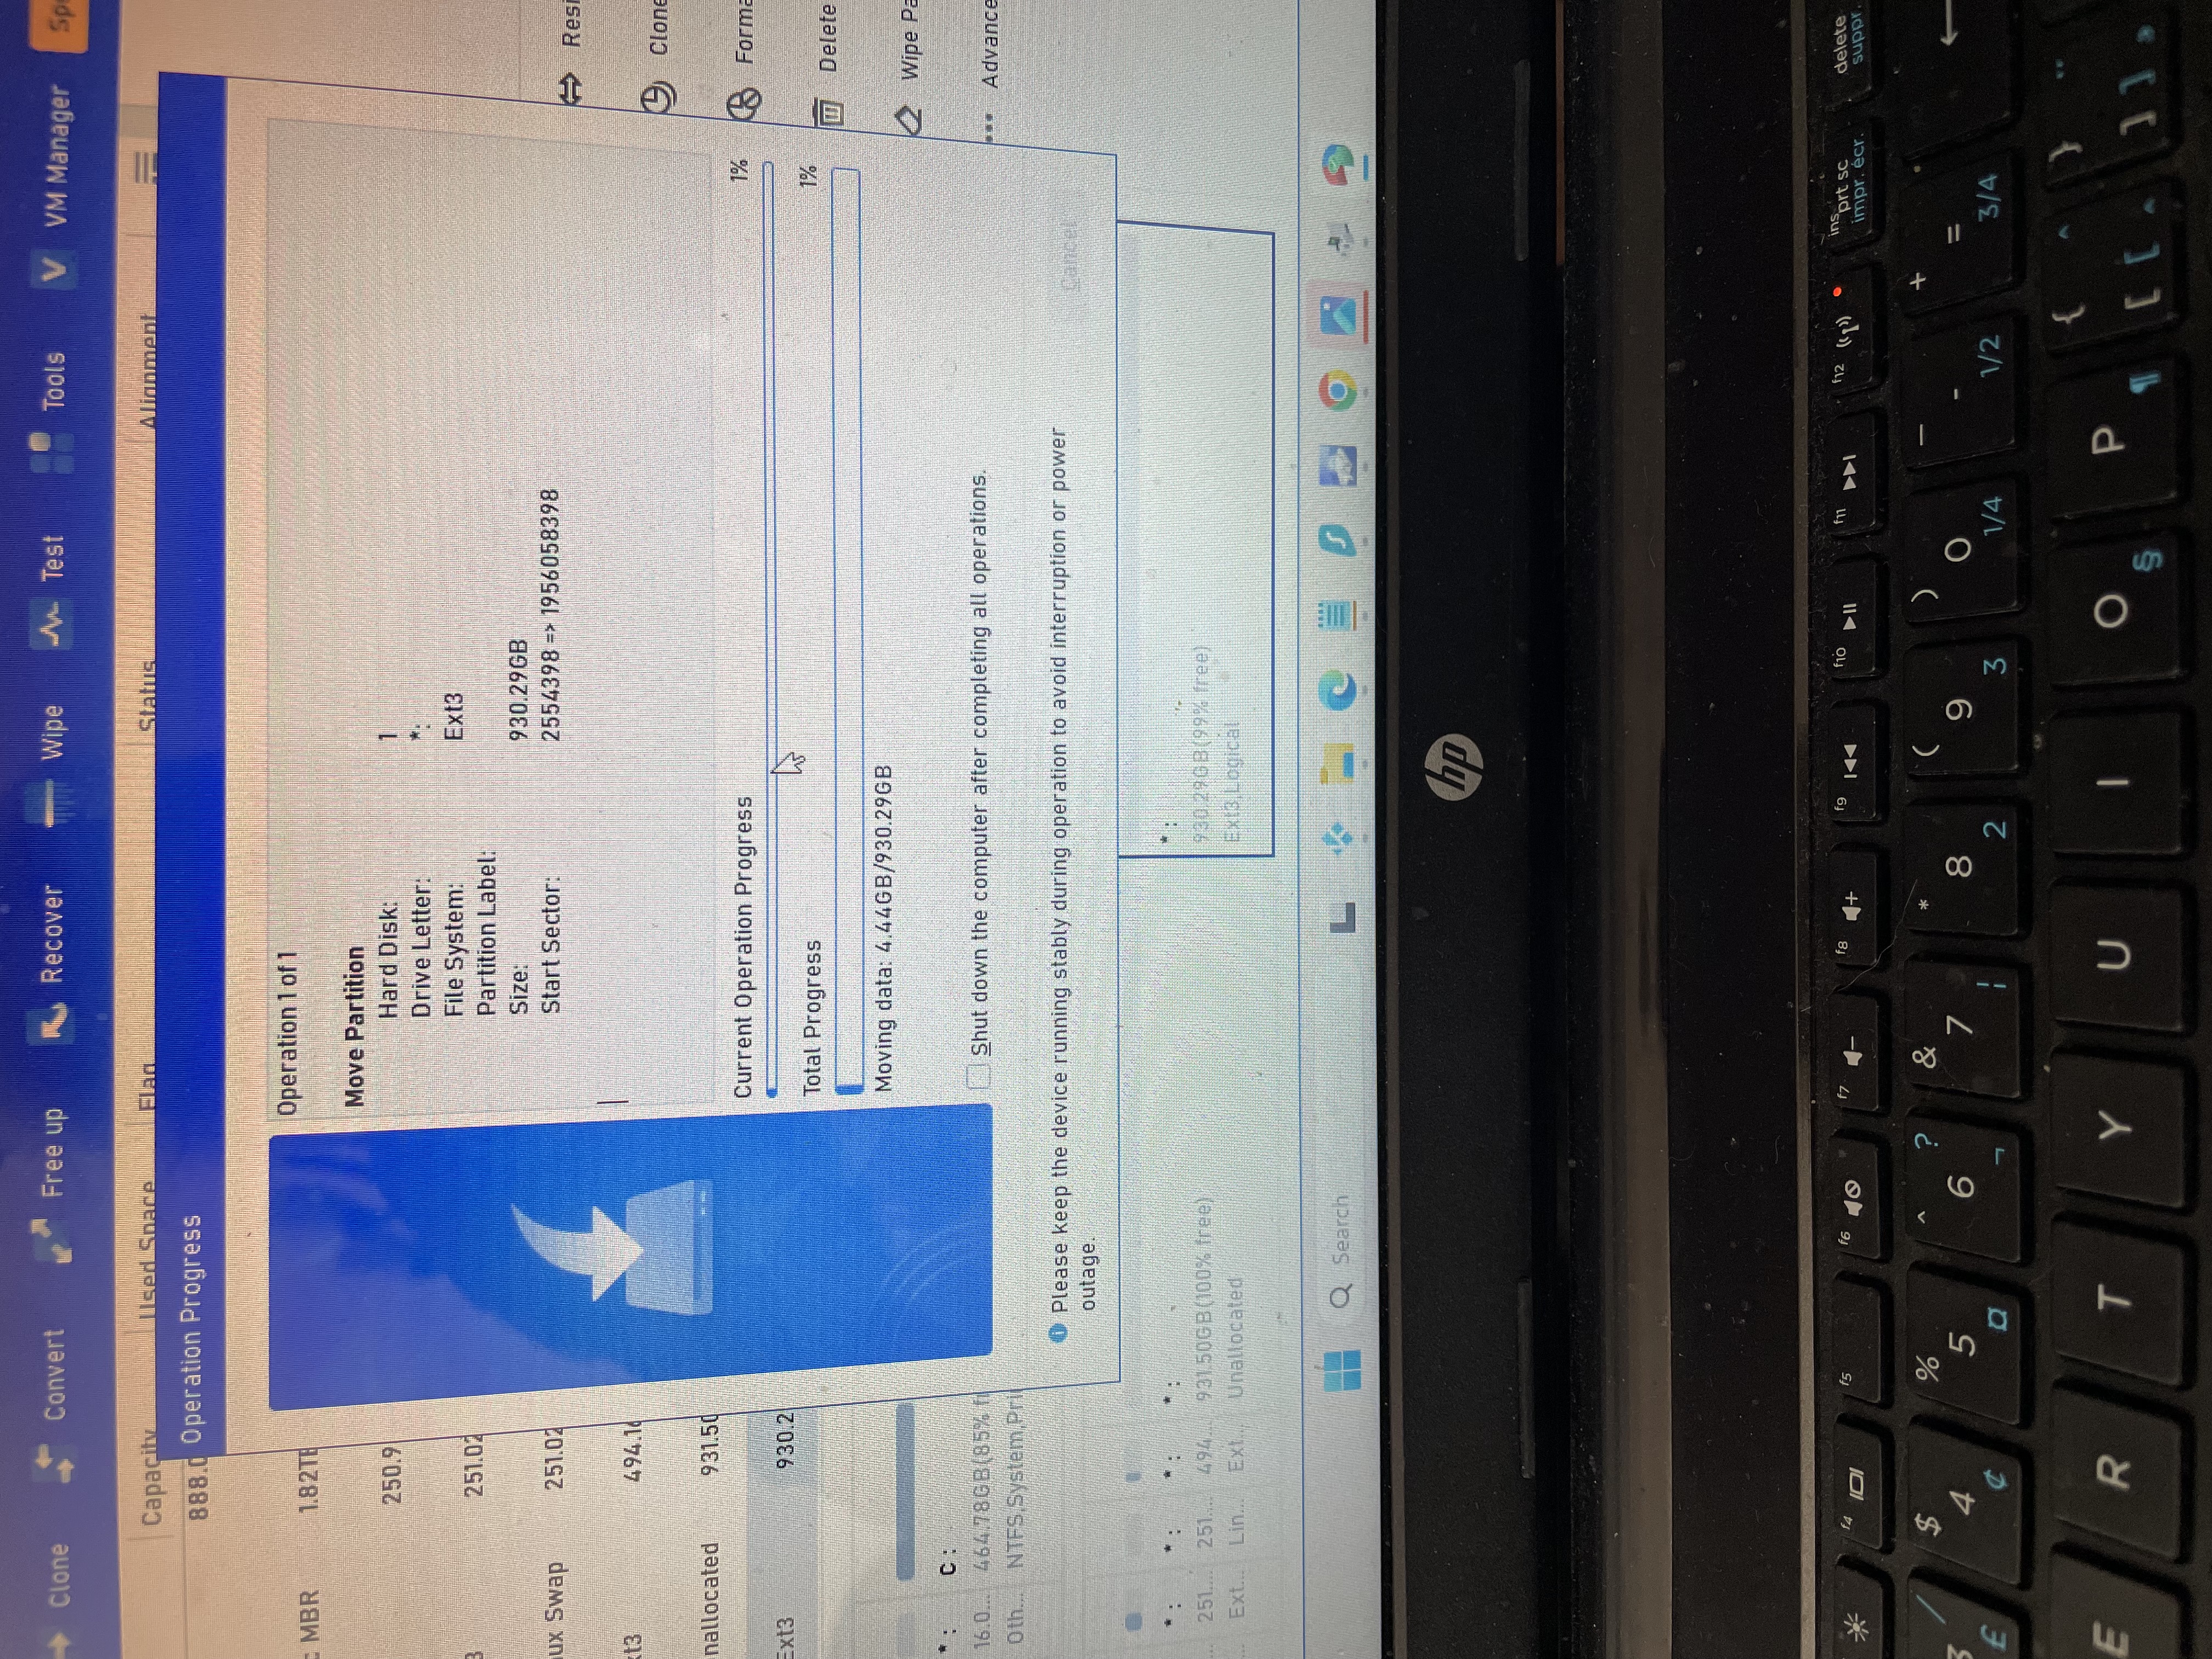
Moving the “unallocated space” (one position ahead of the logical partition) takes several hours to complete. Moving a full 1 TB partition over a USB 2.0 connection using AOMEI takes about 8 to 18 hours. In my case the transfer sat for several hours at 10 percent before my machine eventually blue screened. I moved to another machine with a USB 3 port and used the cloning dock (used above) to do the move and it was much quicker with progress jumping to 20% in about 5 hours…got to 67% then woke up to a blue screen!?? Moved onto a third machine…
3rd Machine Was a Success - But Theory is Wrong
The third machine was successful at moving the partion using AEMOI (albeit slowly), however it turns out that the "Theory" is incorrect. You do not need to move the unallocated space. DO NOT USE AOMEI - instead use Gparted to extend the user storage area to inlclude the Uallocated space.
Gparted - Correct Approach to Utilize Additional 1 TByte
Windows applications cannot handle Ext3 partitions - in order to extend an EXT3 partion you MUST run a Linux environemnt - time to use Gparted.
Here is a video on how to build a bootable USB drive with Gparted that you can use to extend Ext3 partitions. I decided to start all over and re-clone the original drive and then inspect it using Gparted to see if the partition in fact needs to be moved? When I reviewed the drive structure using Gparted, I noticed that the extra space (1 Tbyte) partition is at the end of the disk and the structure of the drive is slightly different than expected. My new theory is that I can simply extend the Unallocated space without needing to move it first using Gparted.
How to Video - Build Bootable USB with Gparted
Using Gparted to Extend Parition
I re-cloned the source disk from the Central Axis and here is what the layout looks like whn I use the cloning dock to examine the Drive: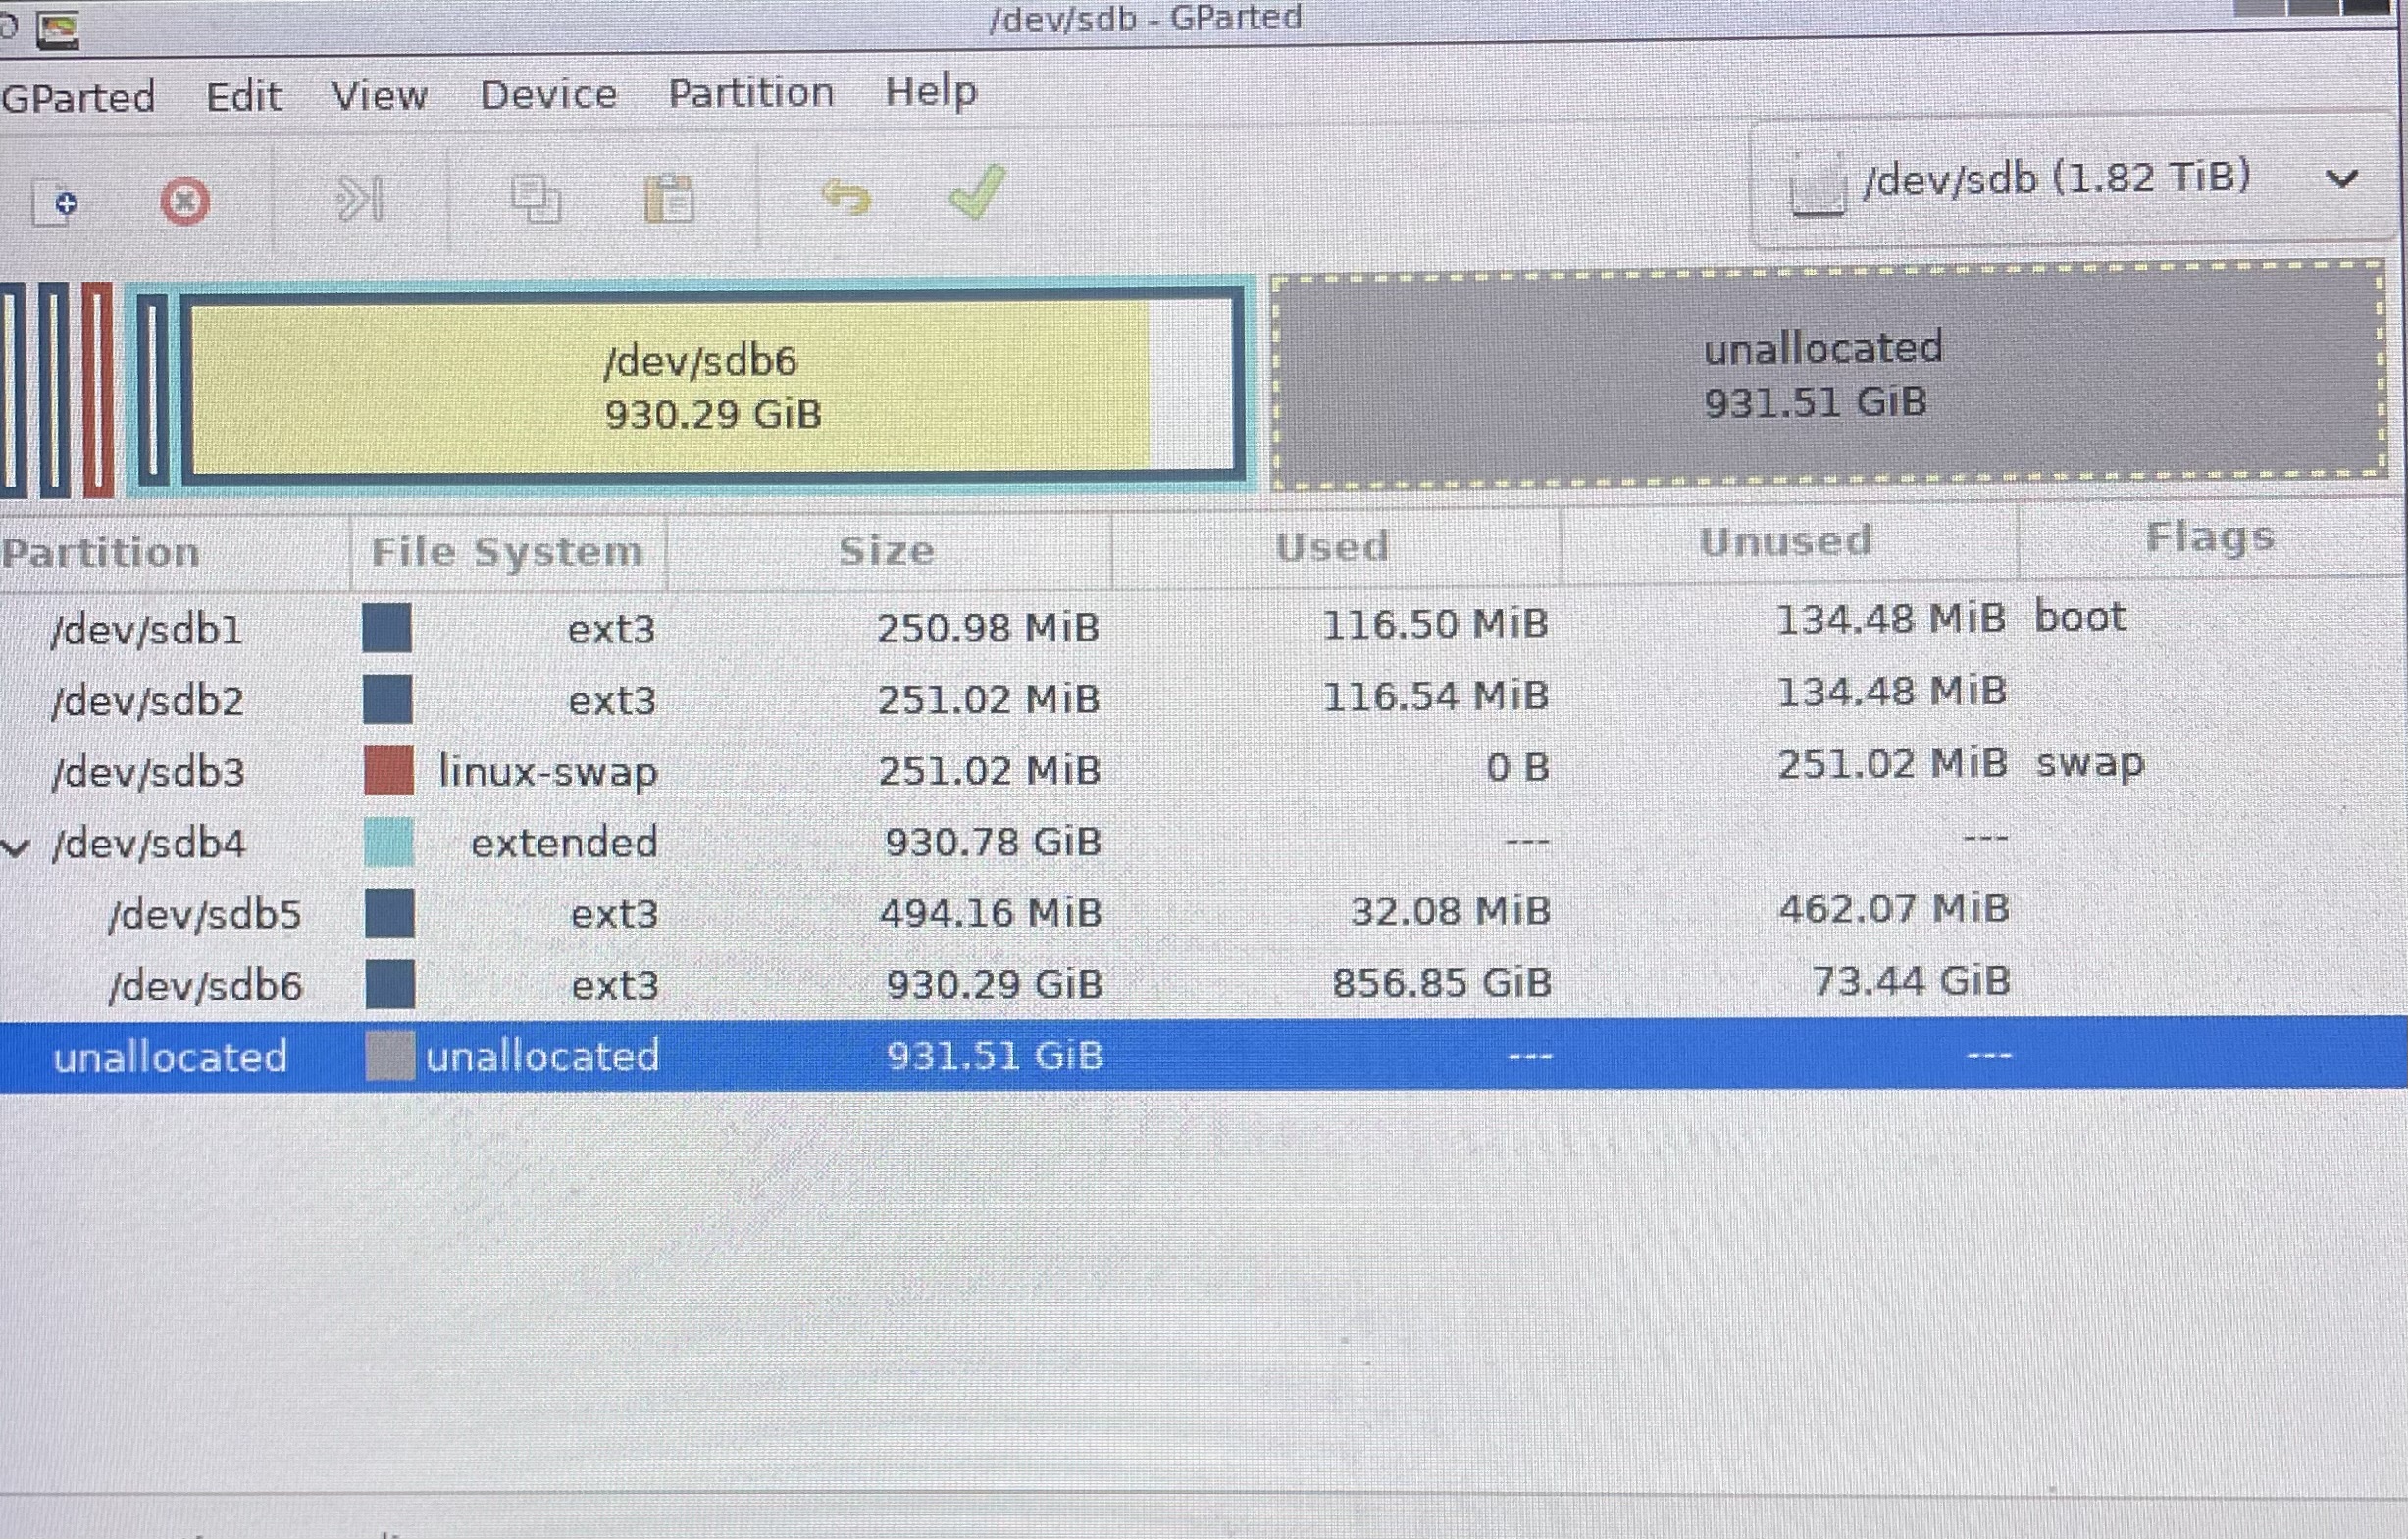
Note:
- /dev/sdb4 is 930.78 Gib
- /dev/sdb6 is 930.29 Gib
- unallocated is 931.51 Gib
With this understanding - I believe that I can just use Gparted to extend the partions without moving the unallocated space effectively more than doubling the user data space. Here are the steps.
Proper Steps To Extend Using Gparted:
Follow the instructions in the video above to build a bootable Gparted USB (in my case I used a small 4 Gbyte USB) and boot a machine into Gparted using the USB.
- I connected my drive using the cloning dock via USB
- Select /dev/sdb4 and use the Resize/Move option to extend the "Extended" file system to include the additional space - Notice that /dev/sdb4 now shows the new size 1.82 TiB
- Then - select the "ext3" user disk /dev/sdb6 and use the Resize/Move option to include the extra 1 Tbyte of "unallocated" space and select the "green checkmark" to apply - you can now see that /dev/sdb6 will changed to be 1.82 TiB in size
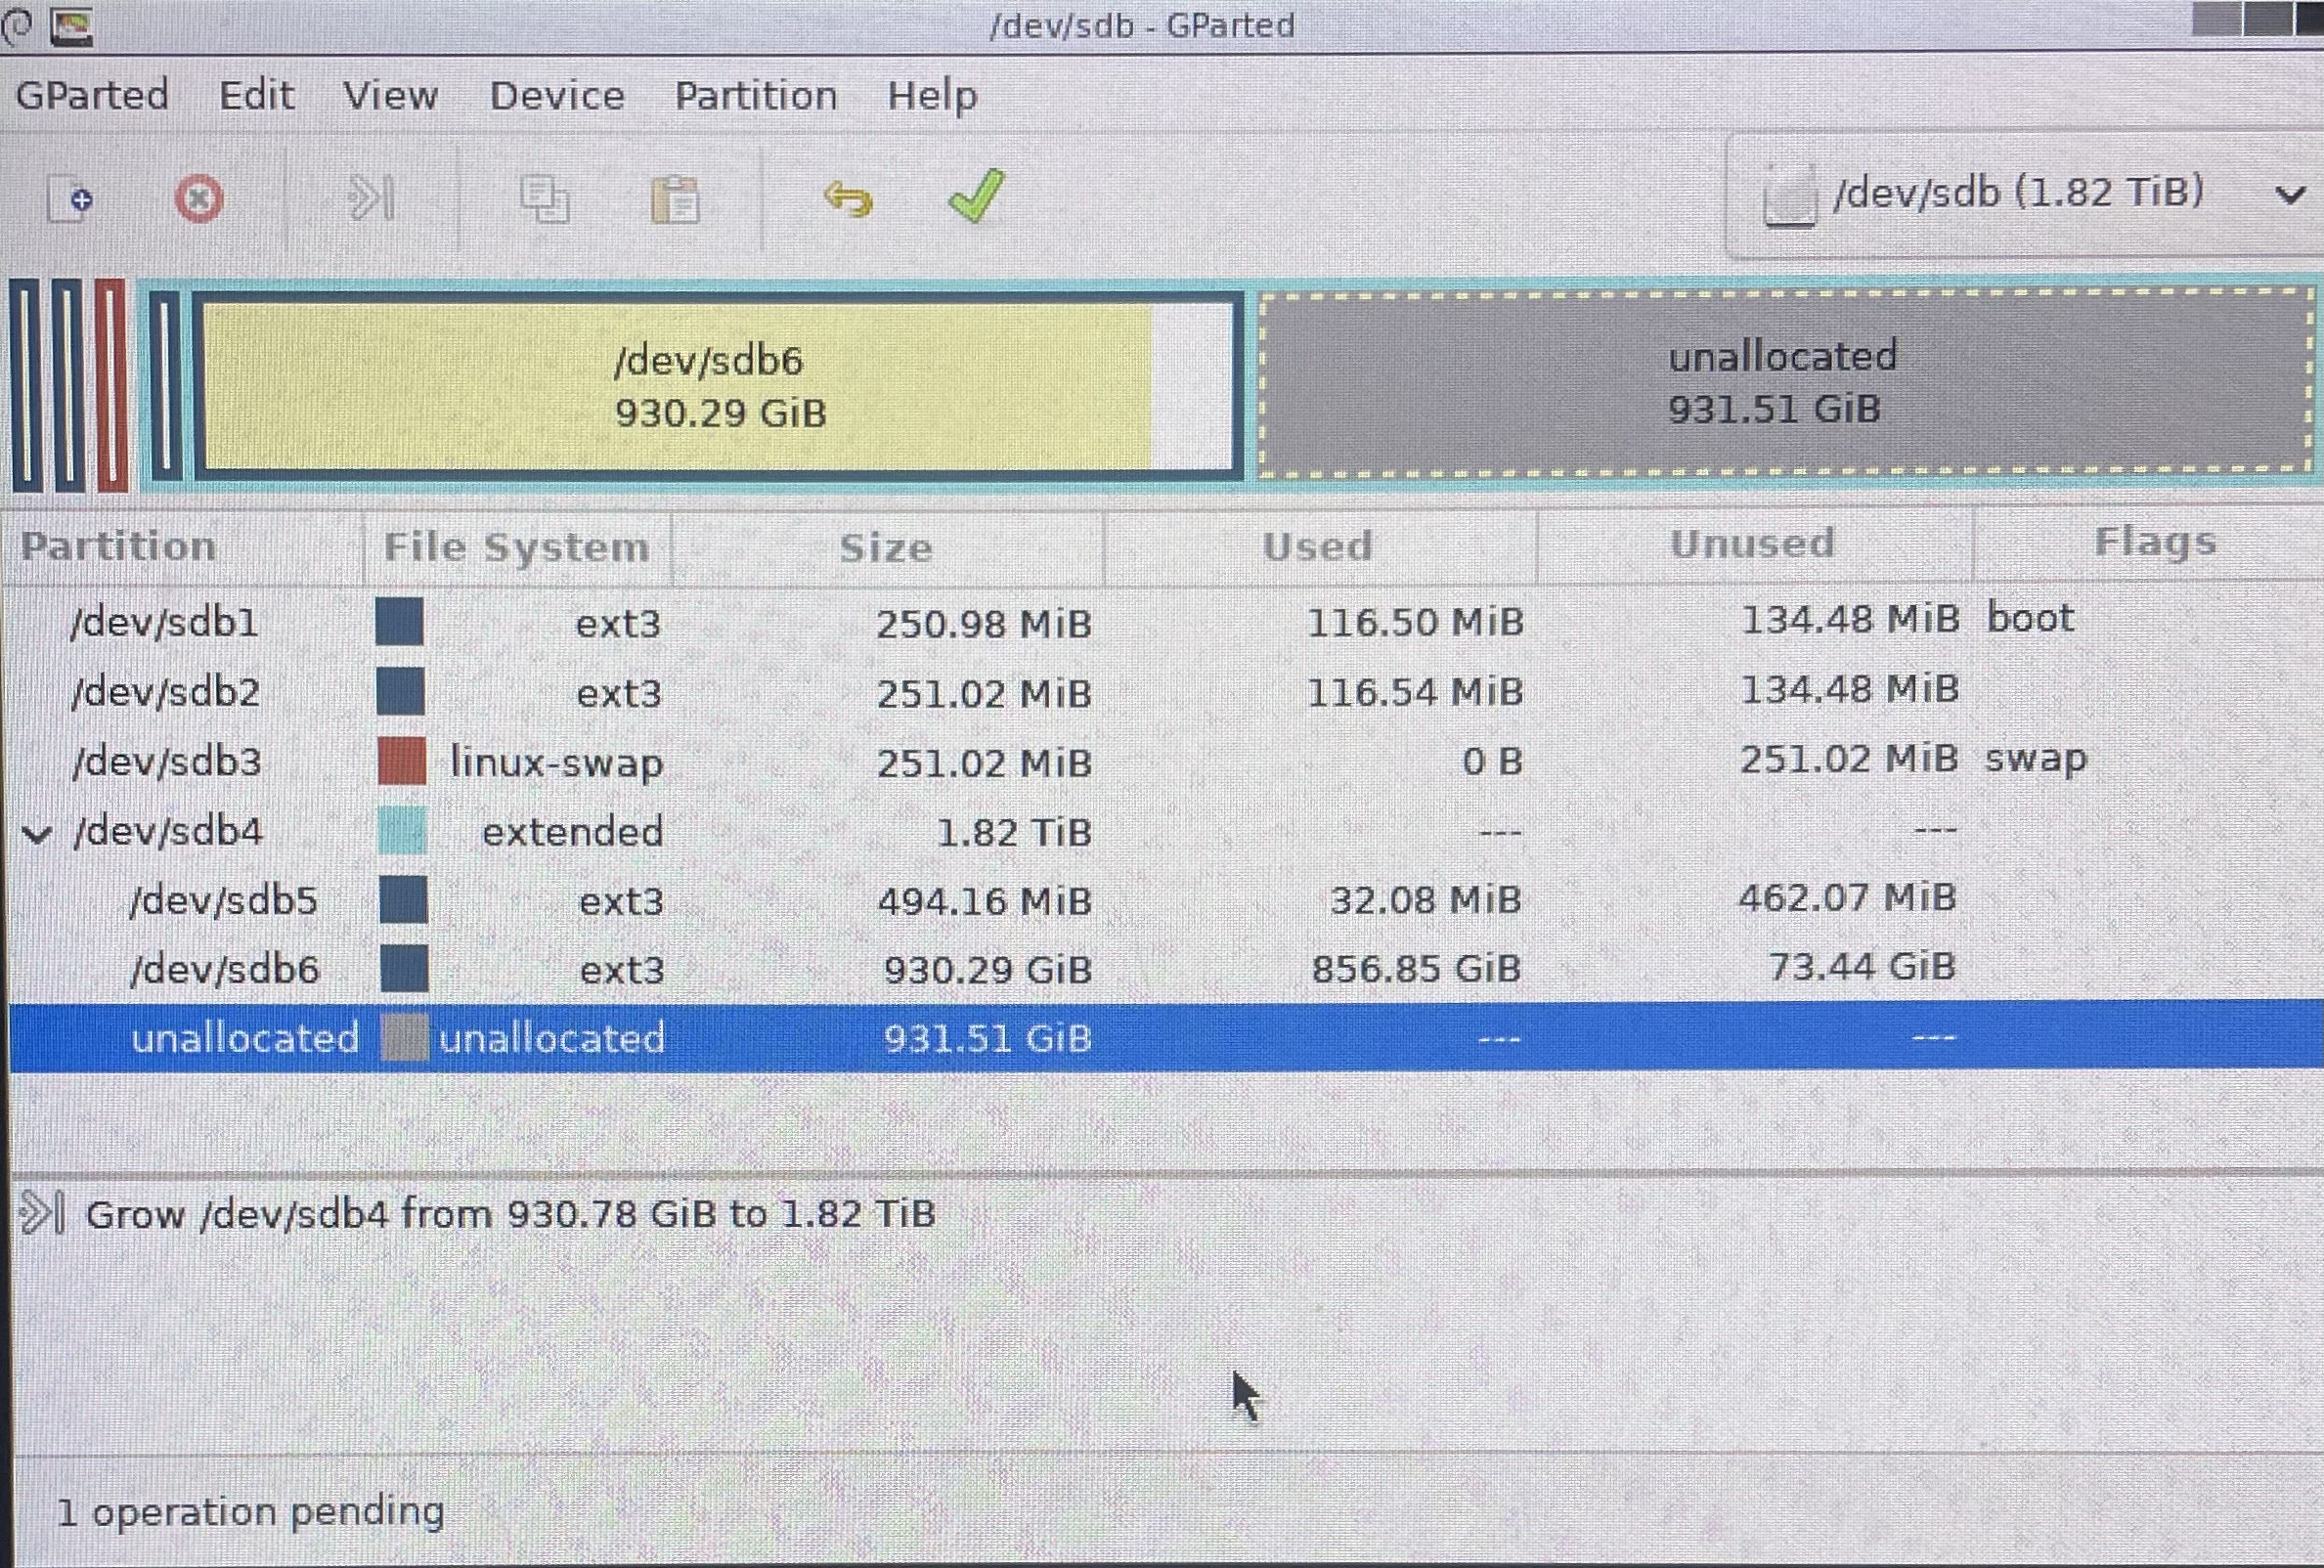
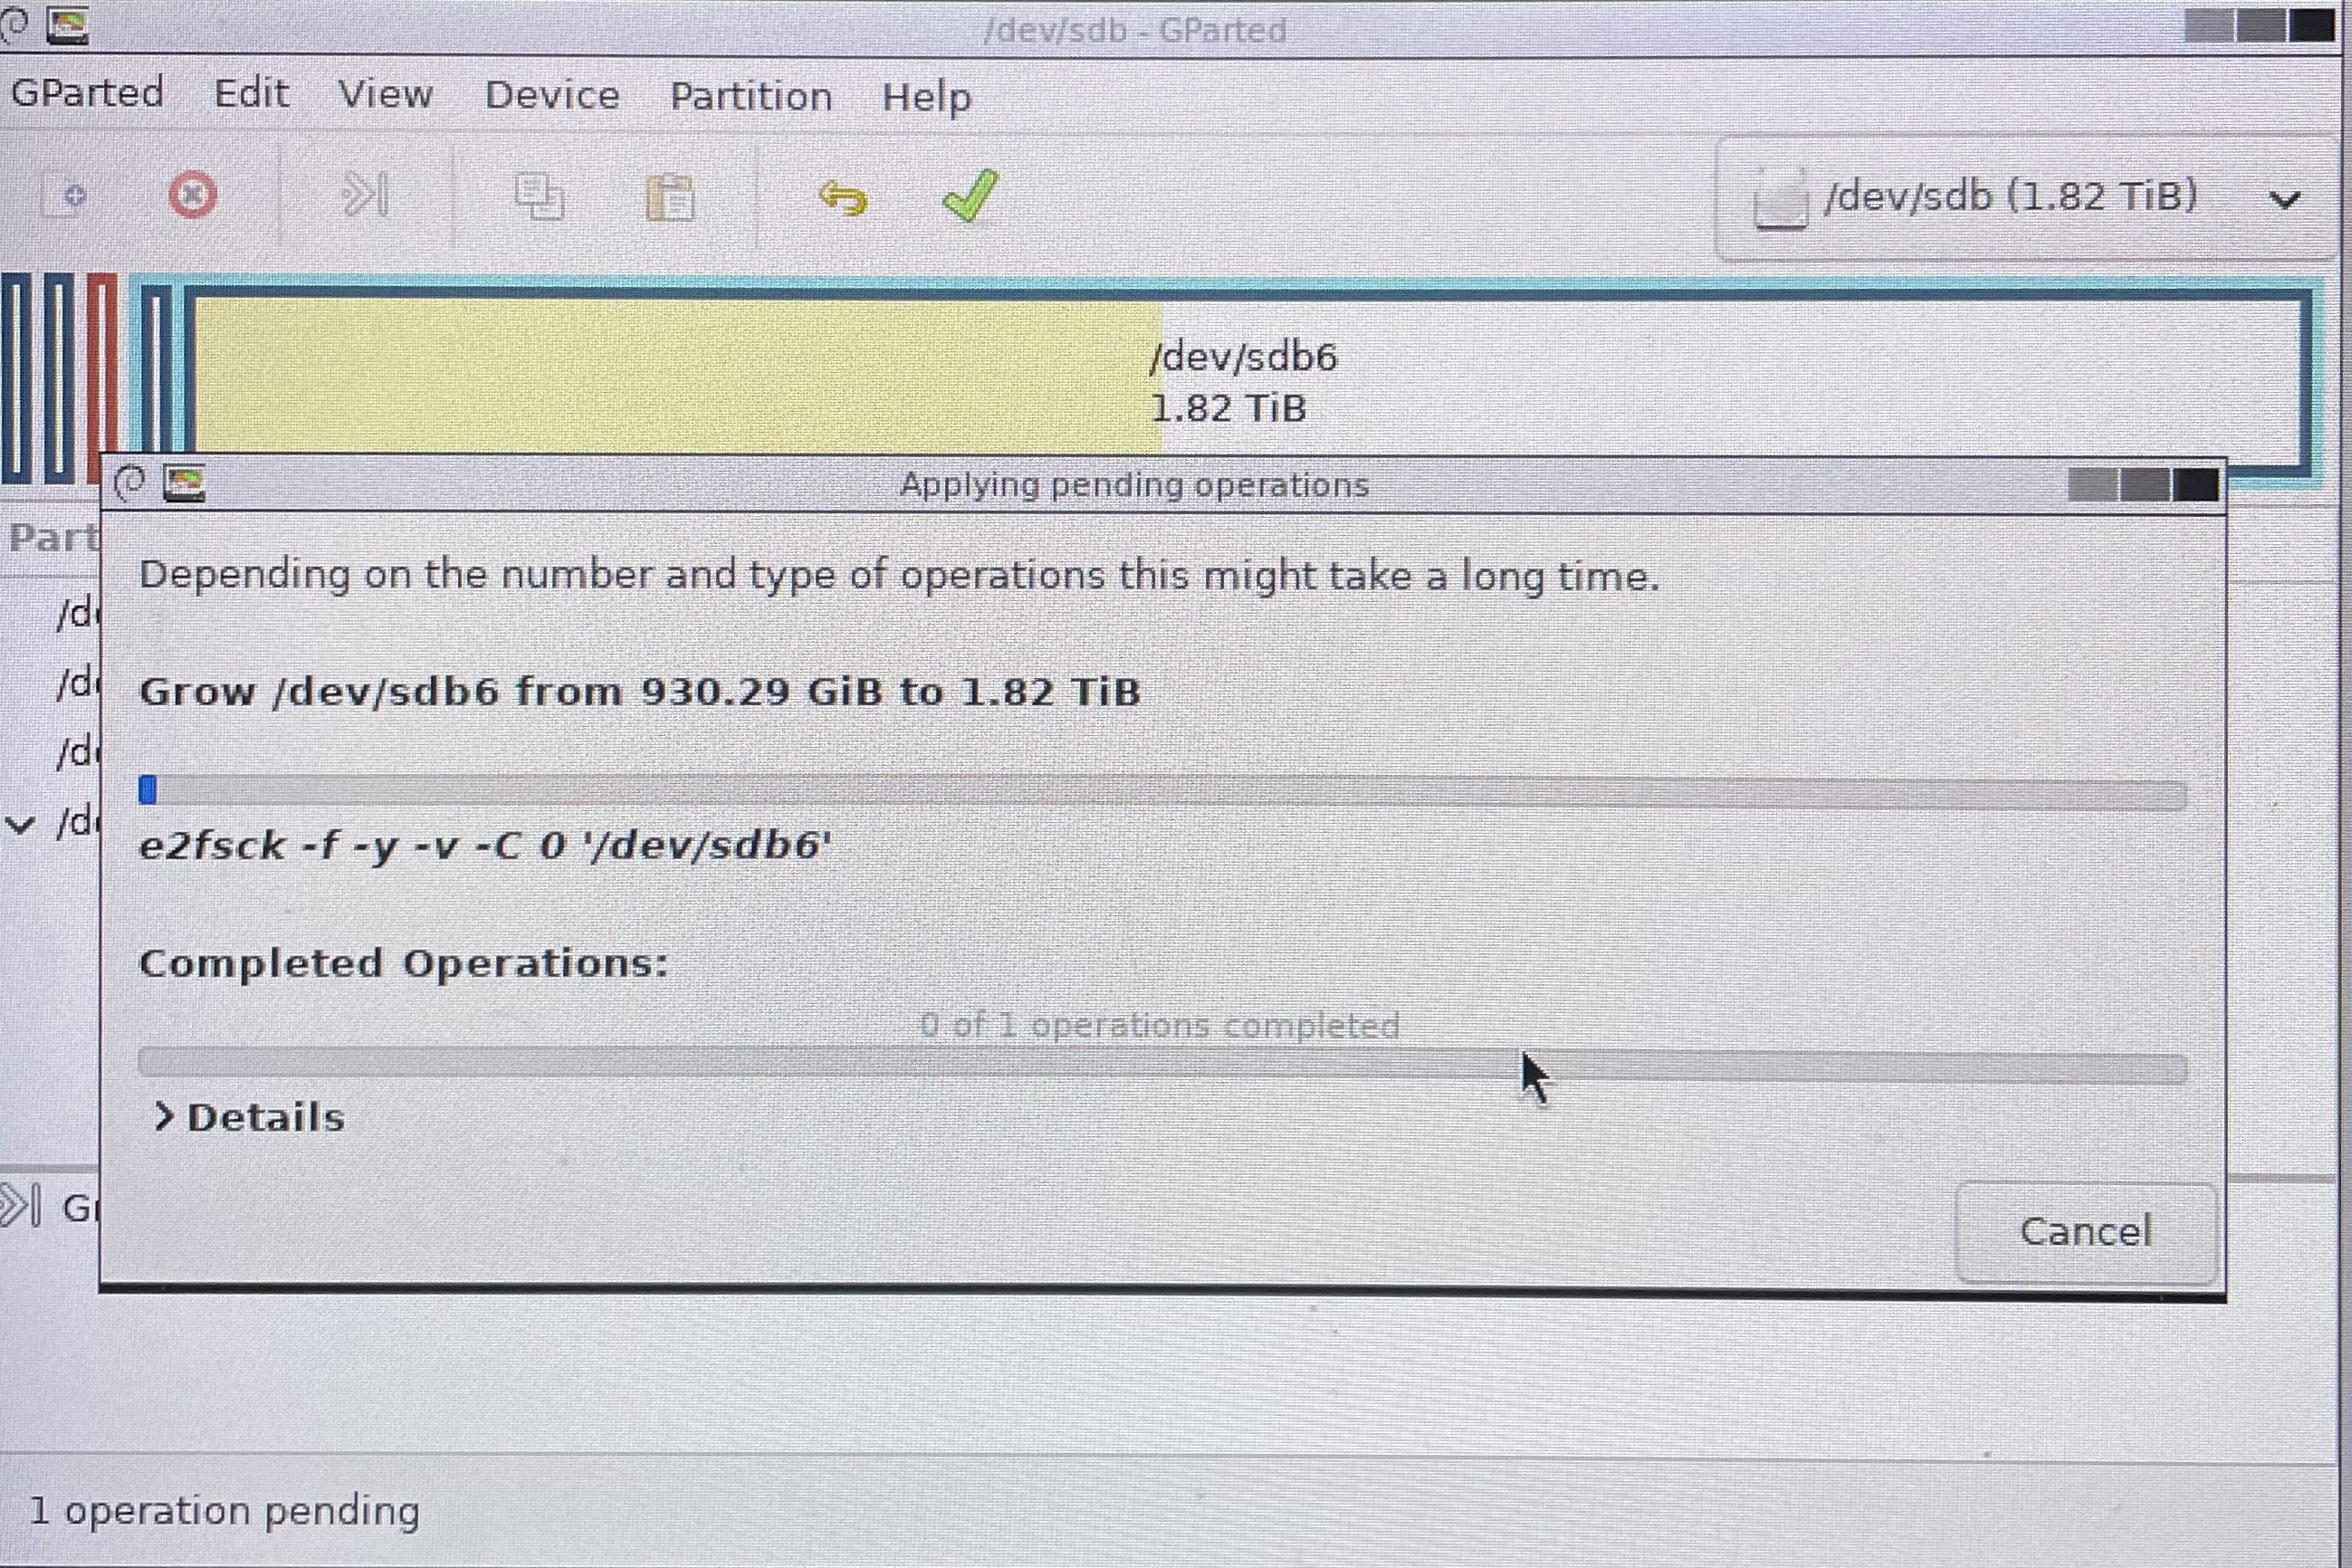
Note: This "extension" will take a some time to complete.
Final Drive Configuration
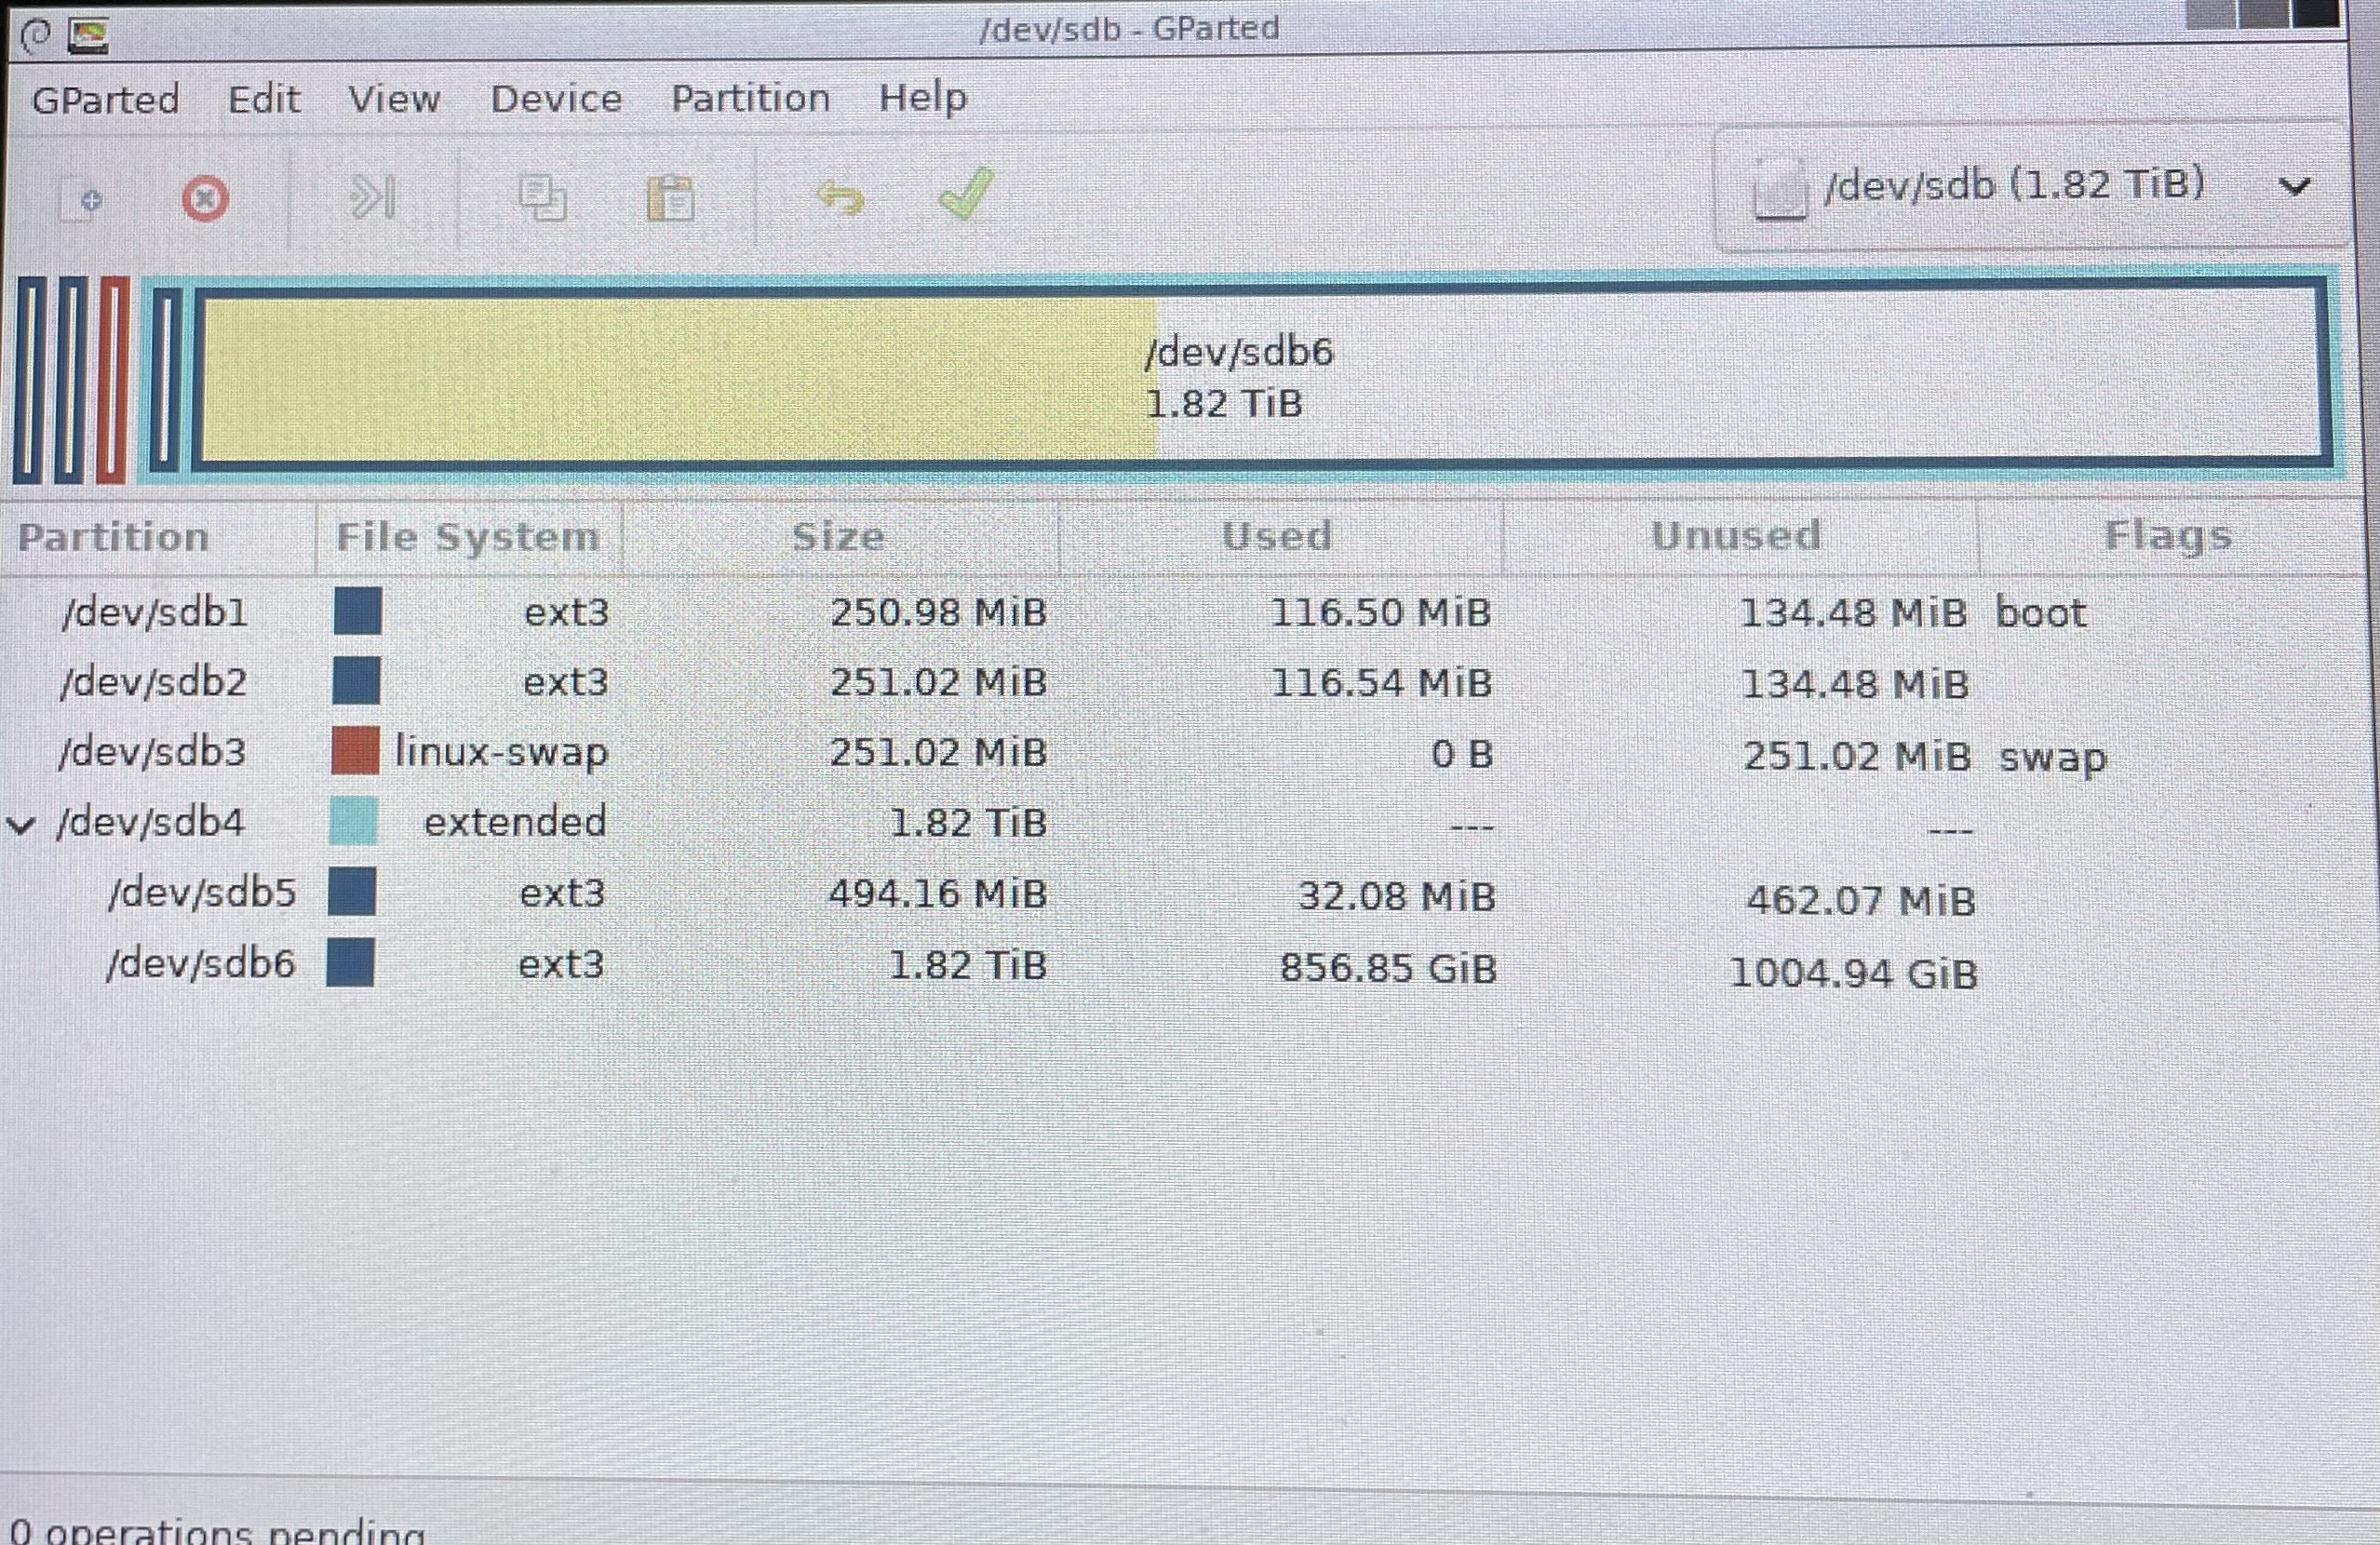
SUCCESS !! Central Axis is now a working 2Tbyte Device
The "Extension" completed and the drive was placed back into the chassis and the user space has successfully been updated to include the additional 1 Tbyte of unallocated space. The diagnostic tool on the Central Axis now runs a successful disk scan - reporting that the drive is operating properely (i.e. it no longer throws a RMA error).
I mounted the drive and Windows (with SMB v1 enabled) is also reporting that the drive has the extra space.
Longer Term Backup Strategy
The longer term backup strategy given how long it takes to build a drive is to also create a “master” 2Tbyte drive with the correct structure, permissions, accounts, etc and a blank user data area that is already extended and keep this drive aside for when a NAS drive fails. This way, and since these drives are all the same - I can just pop in a new drive into the cloning dock and utilize the offline cloning option to build a new NAS drive from this “master” drive when one fails…
Note: this only is useful if I am willing to loose the data in the user partition. Otherwise the drive will need to be cloned and extended.
3 TByte WD Red NAS Drives (WD30EFRX)
I had a couple 3 TByte WD Red drives (WD30EFRX) that were still in “good” condition (as reported by CrystalDiskInfo) so I cloned onto one of them from the failing 1 TByte drive, however I can only make/extend the User logical partition to approximately 2 TBytes (1.91 TB) in size. Once I extended this drive I cloned it to my other 3 TByte WD Red NAS drive. I now have 2 replacement drives ready to go.